
Cam Bearing #5 position and bearing surface marks, light scratches.....
 06-26-2010, 03:21 PM
#1
Registered User
Thread Starter
Join Date: Mar 1999
Location: Kernersville, NC
Posts: 2,063
Cam Bearing #5 position and bearing surface marks, light scratches.....
Guys,
I've run into something I didn't expect.
I've installed 3 cam bearings. They were the "real deal" but this may turn into more practice(LOL, I just hand my check to Summit ).
).
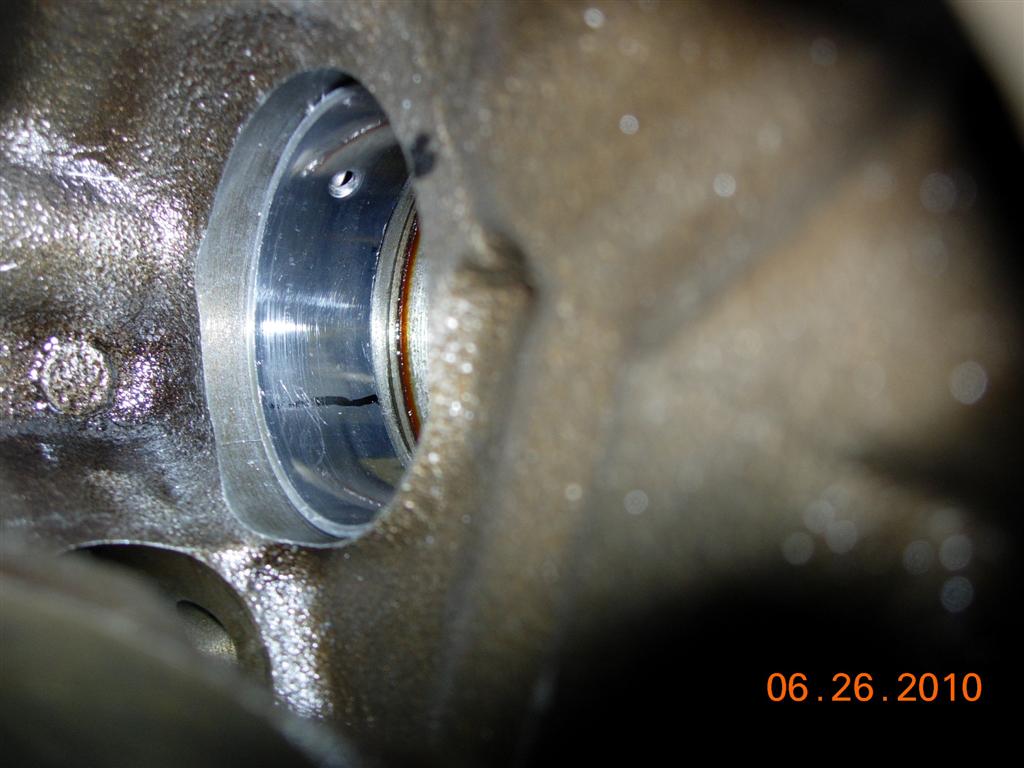
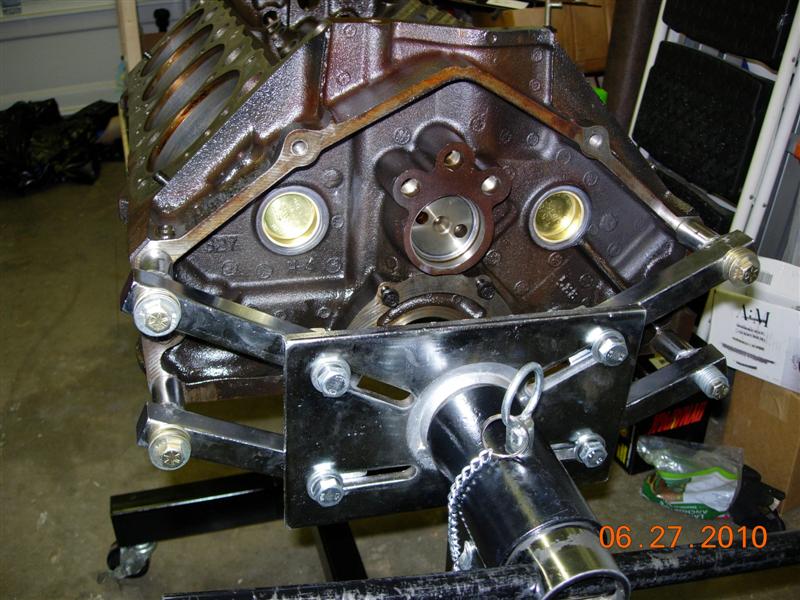
This is a picture with my stock LT1 cam, retaining plate, and cam gear installed(to check bearing position). Have look at the #5 bearing below. The position seems to be on the money. However, when you look at the oiling hole position....it clearly has to go deeper.
It appears that the #5 cam journal only rides partially in the bearing. Can anybody confirm this??? It appears I need to knock in the bearing very close to the ridge mark to the right of the cam bearing(picture #2).
Also, see the light scratches in the last picture(where my sharpie mark is...). Do I need to worry about them? I suspect they will polish out over time with the engine running, but they were made taking in and out the stock cam. I was very careful, but even doing that it puts light marks in the bearings. Even worse than that is my cam bearing install tool put a very light scratch on one of them that I can barely catch a finger nail on....do I need to replace the bearing?
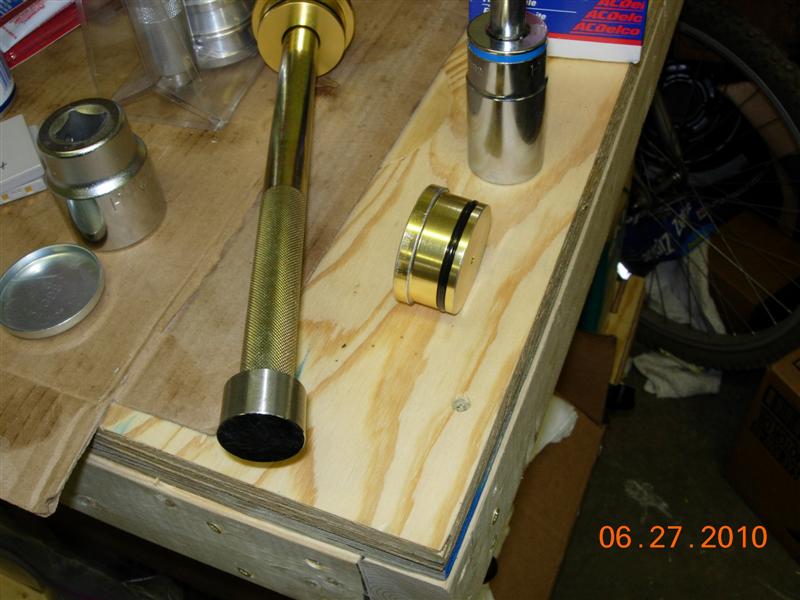
I'm going to buy a couple more sets, but I'm finding out that you must clean the cam install tool very well before moving on to install the next bearing. Also, you must be very careful putting the bearing on the tool and removing the tool from the bearing after install.
Any and all opinions welcome! Thanks!


I've run into something I didn't expect.
I've installed 3 cam bearings. They were the "real deal" but this may turn into more practice(LOL, I just hand my check to Summit
). This is a picture with my stock LT1 cam, retaining plate, and cam gear installed(to check bearing position). Have look at the #5 bearing below. The position seems to be on the money. However, when you look at the oiling hole position....it clearly has to go deeper.
It appears that the #5 cam journal only rides partially in the bearing. Can anybody confirm this??? It appears I need to knock in the bearing very close to the ridge mark to the right of the cam bearing(picture #2).
Also, see the light scratches in the last picture(where my sharpie mark is...). Do I need to worry about them? I suspect they will polish out over time with the engine running, but they were made taking in and out the stock cam. I was very careful, but even doing that it puts light marks in the bearings. Even worse than that is my cam bearing install tool put a very light scratch on one of them that I can barely catch a finger nail on....do I need to replace the bearing?
I'm going to buy a couple more sets, but I'm finding out that you must clean the cam install tool very well before moving on to install the next bearing. Also, you must be very careful putting the bearing on the tool and removing the tool from the bearing after install.
Any and all opinions welcome! Thanks!
Last edited by ACE1252; 06-26-2010 at 03:24 PM.
 06-26-2010, 03:32 PM
#2
Registered User
Join Date: Dec 1969
Location: Little Rock, AR
Posts: 27,714
If the bearing does not line up fully with the hole in the block, the parts are going to friction weld themselves together.  Light scratches that don't seriously catch a finger nail should not be an issue. You can give it a light once-over with some emery cloth.
Light scratches that don't seriously catch a finger nail should not be an issue. You can give it a light once-over with some emery cloth.
06-26-2010, 04:10 PM
#3
Registered User
Thread Starter
Join Date: Mar 1999
Location: Kernersville, NC
Posts: 2,063
What makes me ill is that I've been through two cam bearing sets practicing and still put a light scratch or two in the bearing surfaces(the barely catch a fingernail on type).

Details, details, details. Man, it really is in the small details.
06-26-2010, 04:33 PM
#4
Registered User
Join Date: Jan 2010
Location: western ky
Posts: 274
does the installation tool your using have a rubber band around the expansion collar?
looks like that bearing needs to go back a little farther.. the scratches dont look to bad, like shoebox said if it hangs a fingernail its to much, and you can hit it with some fine emery cloth.
looks like that bearing needs to go back a little farther.. the scratches dont look to bad, like shoebox said if it hangs a fingernail its to much, and you can hit it with some fine emery cloth.
06-26-2010, 09:45 PM
#5
Registered User
Join Date: May 2004
Location: Bay Area, CA
Posts: 2,001
The oil hole needs to be centered over the annulus, knock those bearings in some more.
06-27-2010, 12:14 PM
#6
Registered User
Thread Starter
Join Date: Mar 1999
Location: Kernersville, NC
Posts: 2,063
The install tool I have just has the rubber o-ring around the bearing installer.
Some of those scratches are from jacking around with the stock cam. I also didn't realize that there were a couple of small burrs on the bearing installer from where I knocked out the old bearings(from where the bearing knocked out then lightly tapped a block bulkhead). I've taken care of those burrs and will knock out the bearings I have in now and put in new ones. I'll then be more careful of how I remove the bearing tool from the bearing.
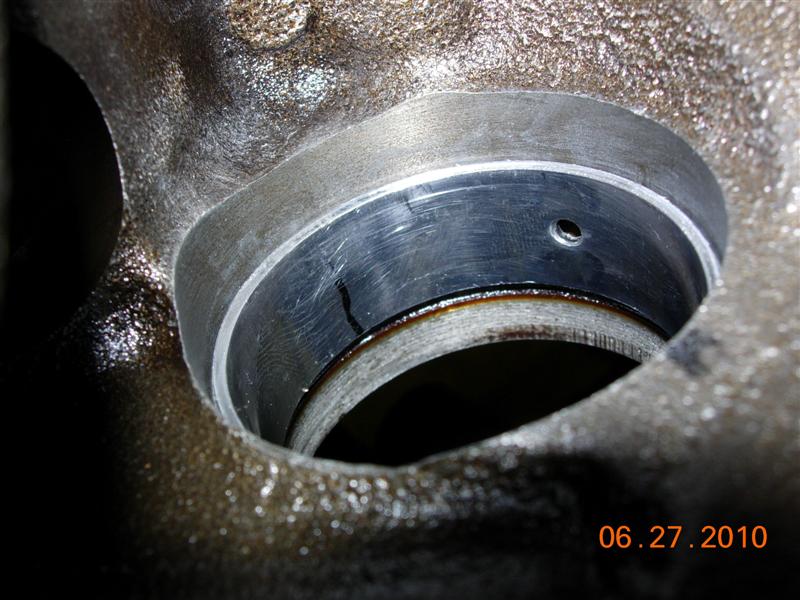
I did have a look at my old number 5 cam bearing and there is a witness mark on it where the cam journal is not fully riding in the bearing. I had made the assumption that it did.

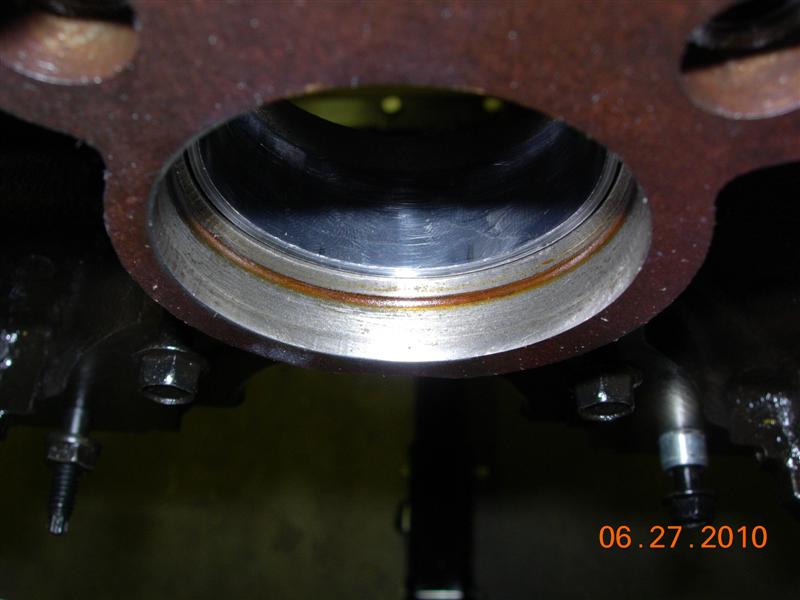
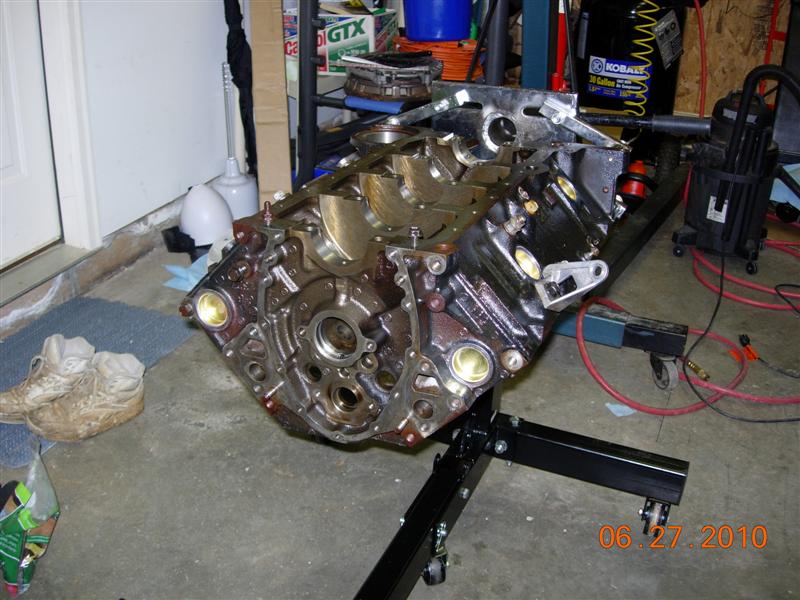
Here is the bearing and it's relation to the cam after the repositioning of the bearing.

Today was not a total loss. I did get all my core plugs installed.
Some of those scratches are from jacking around with the stock cam. I also didn't realize that there were a couple of small burrs on the bearing installer from where I knocked out the old bearings(from where the bearing knocked out then lightly tapped a block bulkhead). I've taken care of those burrs and will knock out the bearings I have in now and put in new ones. I'll then be more careful of how I remove the bearing tool from the bearing.
I did have a look at my old number 5 cam bearing and there is a witness mark on it where the cam journal is not fully riding in the bearing. I had made the assumption that it did.
Here is the bearing and it's relation to the cam after the repositioning of the bearing.
Today was not a total loss. I did get all my core plugs installed.
Last edited by ACE1252; 06-27-2010 at 12:20 PM.
06-27-2010, 12:51 PM
#7
Registered User
Join Date: May 2004
Location: Bay Area, CA
Posts: 2,001
The bearing installers I use have an expanding mandrel at the end with a rubber sleeve that covers the whole thing....bearing position looks good now.
I put freeze plugs in after painting, looks nicer that way.

I put freeze plugs in after painting, looks nicer that way.
06-27-2010, 11:44 PM
#11
Registered User
Join Date: Jan 2010
Location: western ky
Posts: 274
looks almost like the back of the collar between the o-ring and the shoulder is scuffing it, is the bearing that tight on the metal collar to where the bearing hangs when you put it over the 0-ring? put a light film of oil on the inside of the bearing when you slide it over the o-ring and collar. you probably did that anyways, you seem pretty meticulous in your methods.
if it will fit,try a piece of black tape between the shoulder and o-ring, that might help. make sure the tape doesnt hang on the bearing though as it would cause a mis-alignment of the bearing when you drive the bearing home..
if it will fit,try a piece of black tape between the shoulder and o-ring, that might help. make sure the tape doesnt hang on the bearing though as it would cause a mis-alignment of the bearing when you drive the bearing home..

Thread
Thread Starter
Forum
Replies
Last Post
dbusch22
Forced Induction
6
10-31-2016 11:09 AM
ChrisFrez
2010 - 2015 Camaro News, Sightings, Pictures, and Multimedia
2
12-07-2014 11:32 AM
Z284ever
Automotive News / Industry / Future Vehicle Discussion
57
08-04-2002 03:48 PM