How to: Remove EVAP/carbon/vapor canister and replace purge valve with pics
#1
This is something I've wanted to do for a while but couldn't find clear directions anywhere on how to do it. I finally decided to just go for it and give the internet the how-to I've always wanted. This was done on a 1994 Trans Am.
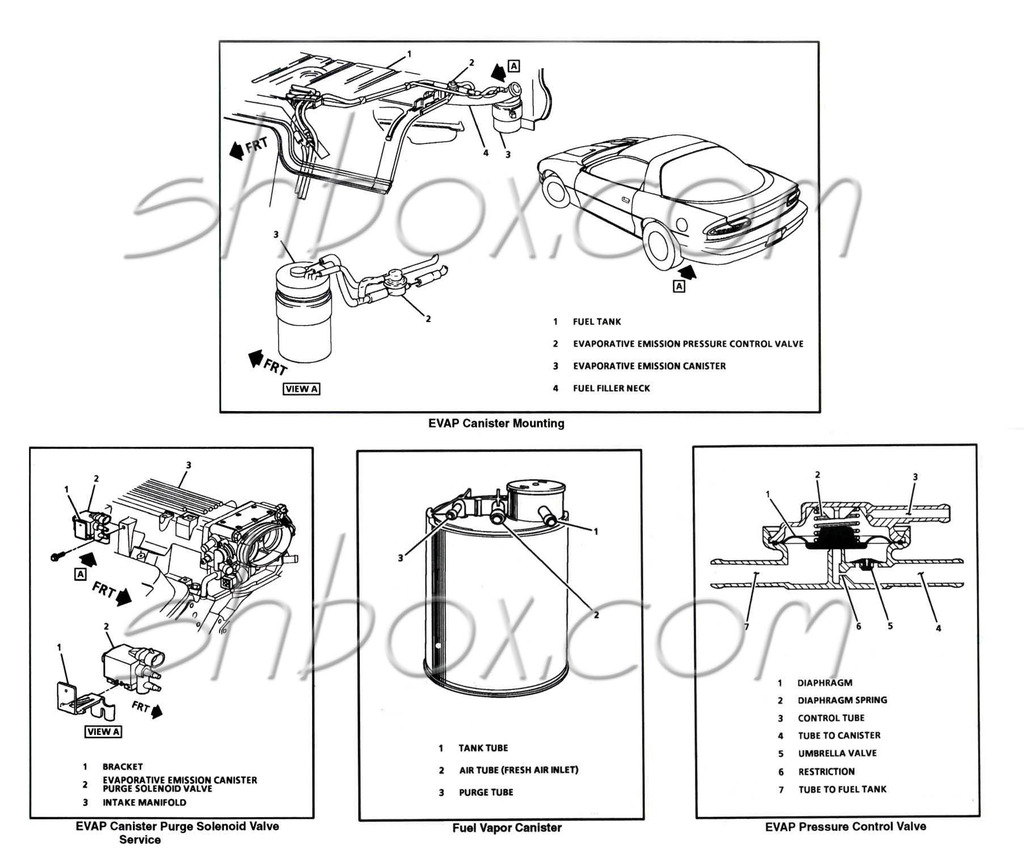
First, here are some outstanding diagrams of the EVAP system from shbox's site:
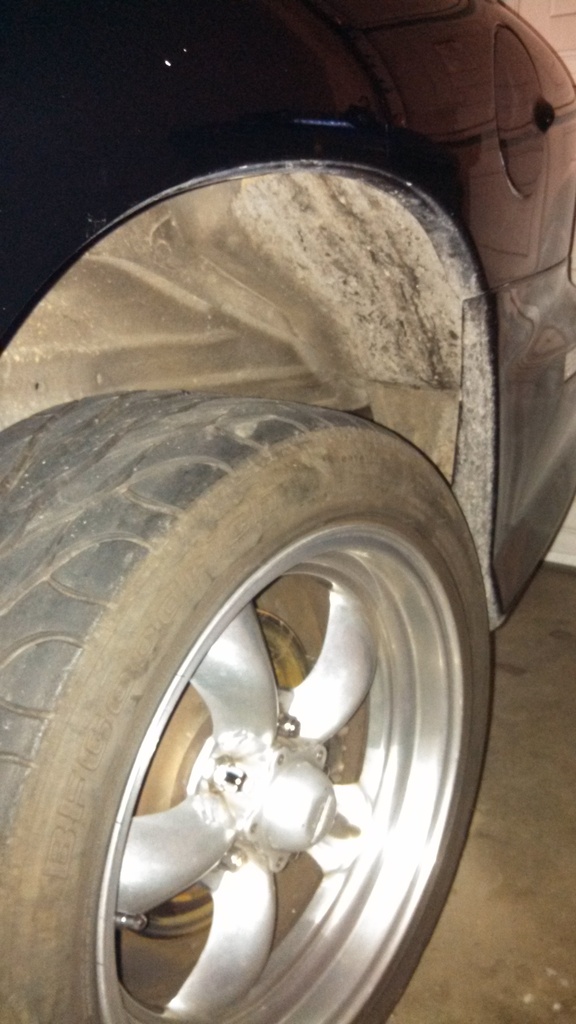
This is where we're going. Driver's side wheel well. After taking all the necessary safety precautions, loosen the lug nuts and jack the wheel up enough so it's just off the ground allowing you to remove it. There's space in front of the wheel to put your jack under the frame.
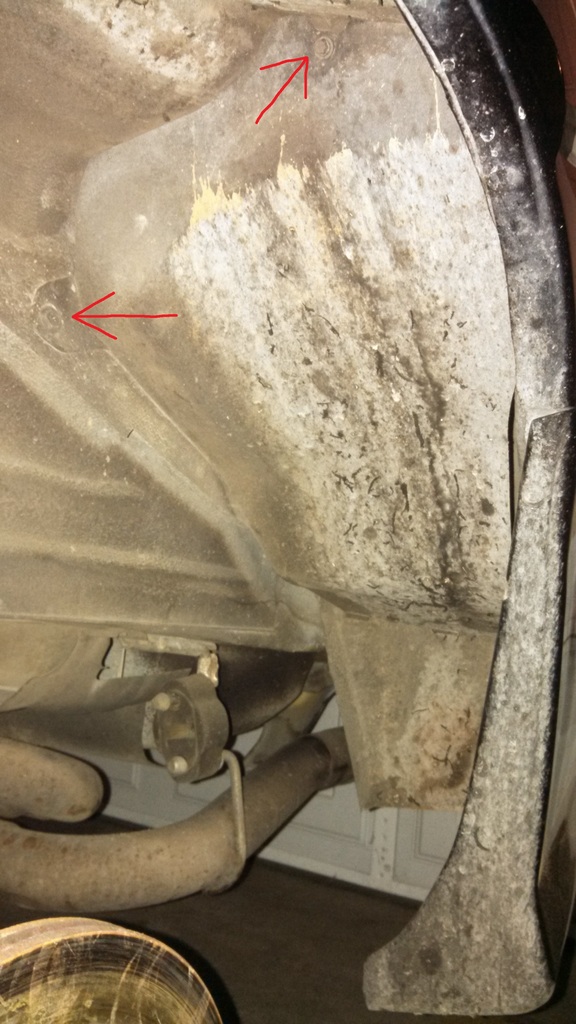
Now this plastic wheel well panel needs to come off. There are two screws, one phillips head and one hex head. The hex head is 7mm. The phillips head is in a plastic push fastener than can easily be pushed out from the back once the screw is out. Don't mind the fresh rubber fragments :eyes:
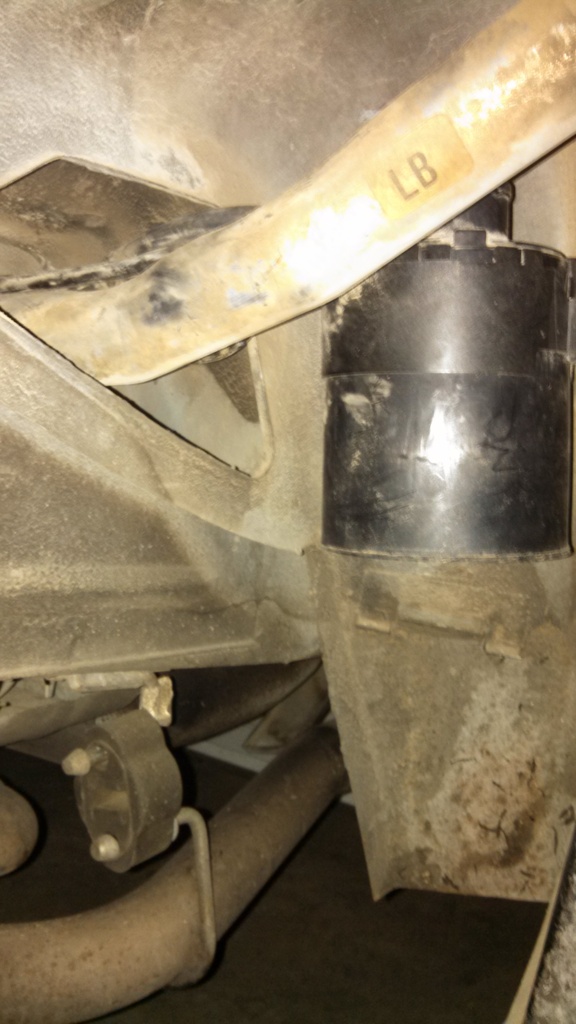
Here's the view once the wheel well panel is off. You can see the EVAP canister (also called carbon or vapor canister) nestled in its little cubby space.
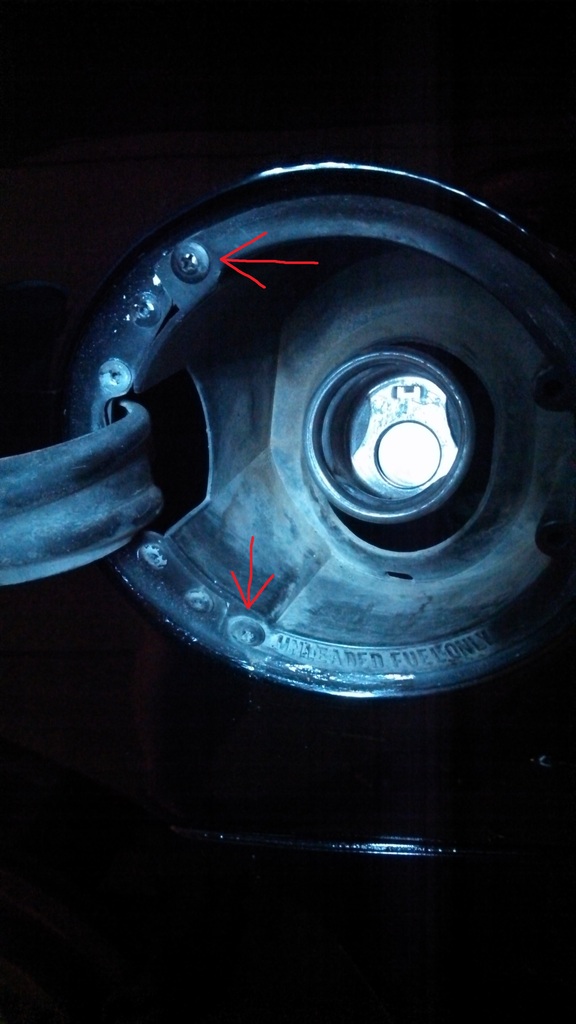
Now the plastic strap needs to be unclipped to allow for removal of the canister. This is the part I couldn't find guidance for anywhere online and I really didn't want to break the plastic. Well, I broke the plastic. I didn't realize until after the deed was done that the plastic shroud around the filler neck could be removed, allowing much better visualization of the clip. Just remove these two screws and it pulls right off.
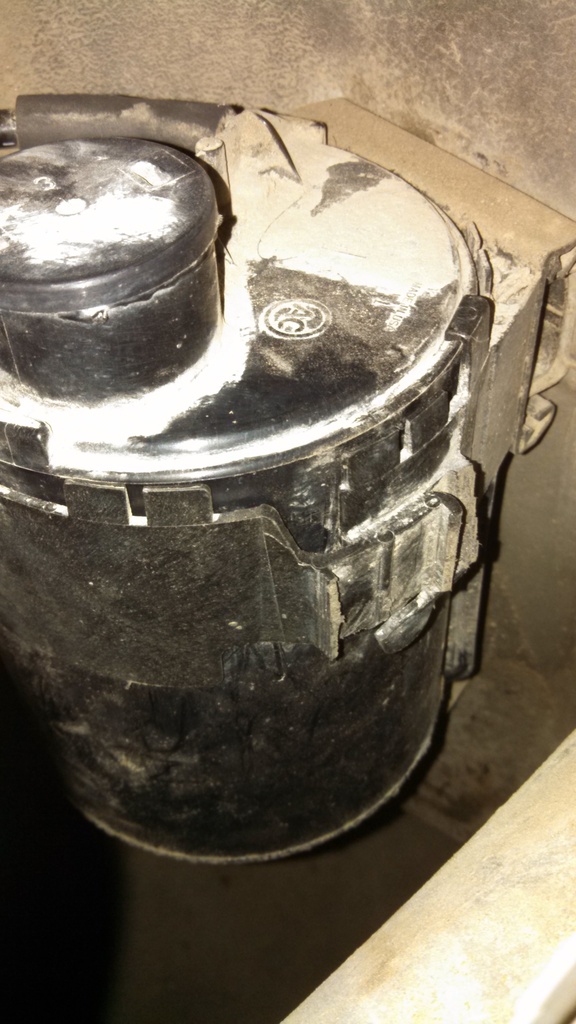
Now you can see exactly how to unclip the plastic strap. I didn't think to start taking pictures of all this until after I had broken it, but you can essentially see how it clips together.
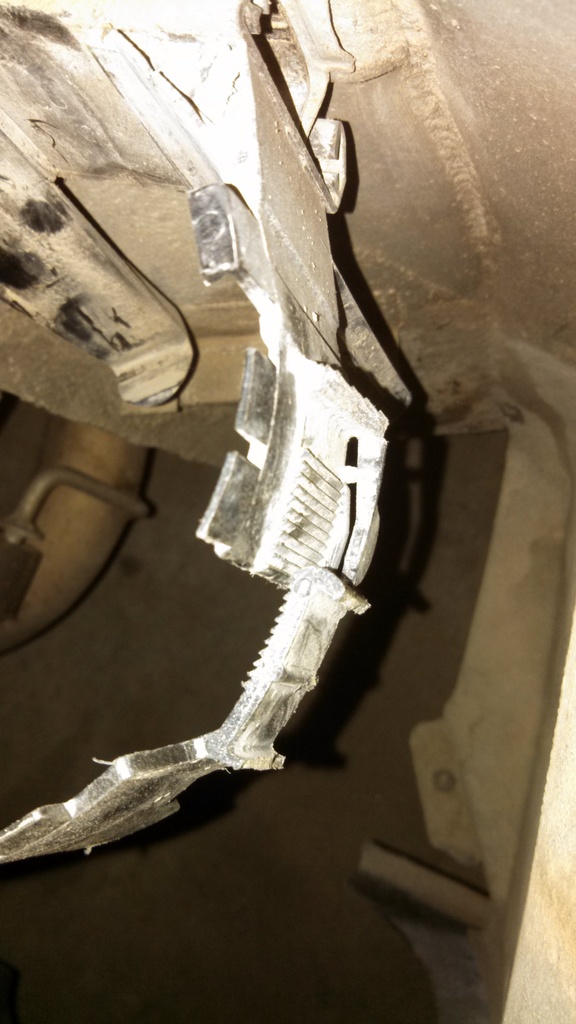
A close up of the clip:
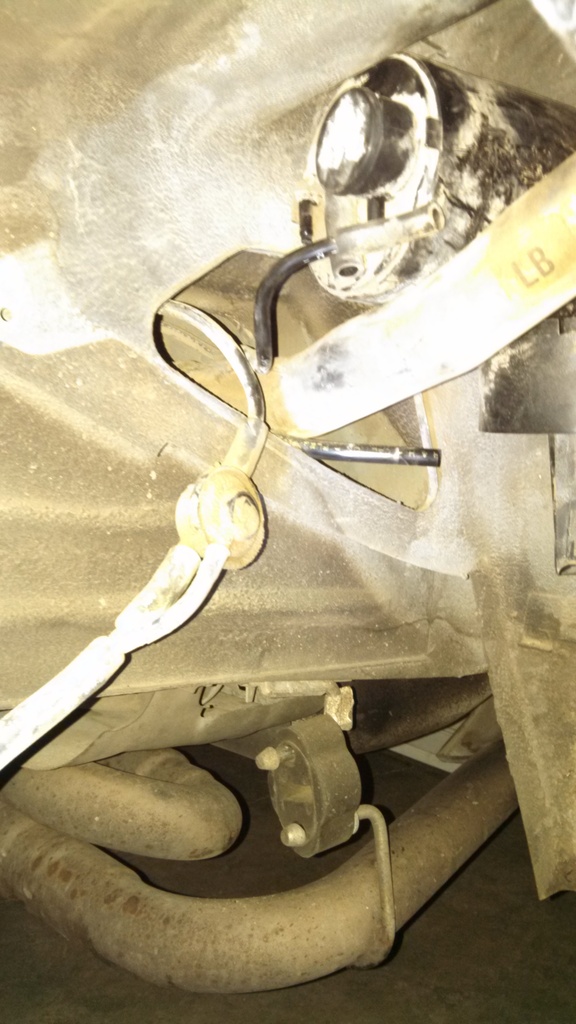
You can't get the canister out without taking the hoses off and mine were stuck on there pretty good. I had to angle the canister like this to be able to coerce the hoses off.
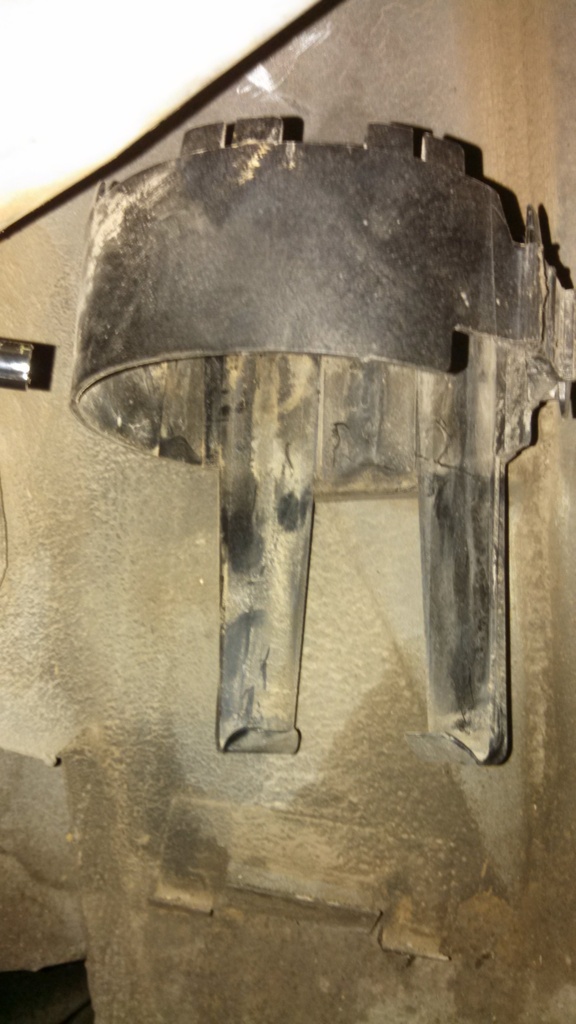
After that the canister just slides out the bottom. The empty mounting location:
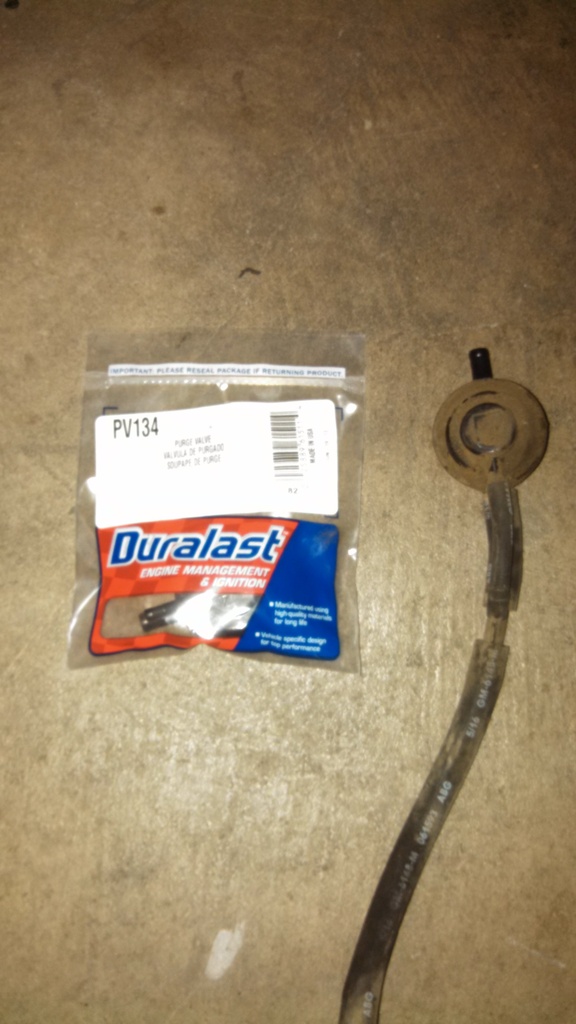
To remove the purge valve, slide the spring clamp down the hose and twist/pull the valve off. Here is the replacement.
At this time you can use compressed air to blow out the hoses and ensure there is no residue clogging them up. Ideally you would use a rubber tipped air blow gun on a compressor but I did this at 3 in the morning so I just used the gun as a straw and asserted some good 'ol lung power (which was probably better for the canister since I wanted to make sure that wasn't clogged either). That's it! Install is reverse of removal. Hopefully this helps someone.
First, here are some outstanding diagrams of the EVAP system from shbox's site:

This is where we're going. Driver's side wheel well. After taking all the necessary safety precautions, loosen the lug nuts and jack the wheel up enough so it's just off the ground allowing you to remove it. There's space in front of the wheel to put your jack under the frame.

Now this plastic wheel well panel needs to come off. There are two screws, one phillips head and one hex head. The hex head is 7mm. The phillips head is in a plastic push fastener than can easily be pushed out from the back once the screw is out. Don't mind the fresh rubber fragments :eyes:

Here's the view once the wheel well panel is off. You can see the EVAP canister (also called carbon or vapor canister) nestled in its little cubby space.

Now the plastic strap needs to be unclipped to allow for removal of the canister. This is the part I couldn't find guidance for anywhere online and I really didn't want to break the plastic. Well, I broke the plastic. I didn't realize until after the deed was done that the plastic shroud around the filler neck could be removed, allowing much better visualization of the clip. Just remove these two screws and it pulls right off.

Now you can see exactly how to unclip the plastic strap. I didn't think to start taking pictures of all this until after I had broken it, but you can essentially see how it clips together.

A close up of the clip:

You can't get the canister out without taking the hoses off and mine were stuck on there pretty good. I had to angle the canister like this to be able to coerce the hoses off.

After that the canister just slides out the bottom. The empty mounting location:

To remove the purge valve, slide the spring clamp down the hose and twist/pull the valve off. Here is the replacement.

At this time you can use compressed air to blow out the hoses and ensure there is no residue clogging them up. Ideally you would use a rubber tipped air blow gun on a compressor but I did this at 3 in the morning so I just used the gun as a straw and asserted some good 'ol lung power (which was probably better for the canister since I wanted to make sure that wasn't clogged either). That's it! Install is reverse of removal. Hopefully this helps someone.
#3
Re: How to: Remove EVAP/carbon/vapor canister and replace purge valve with pics
Not trying to go all Lazarus on this thread, but thank you! I’m new to the community and this thread helped me replace my evap canister without much trouble. I would add that rather than trying to “unclip “ the sawtooth clip (the part you showed a picture of breaking) I grabbed the bottom lip that mounts to the wheel well, and pulled it down and toward the front of the car (read this in another thread). This took the housing off of the car and made it pretty easy to work with. It snapped back on as quickly as it snapped off and I avoided the risk of breaking the housing clip.
Thanks again if you are still out there!
Thanks again if you are still out there!
Thread
Thread Starter
Forum
Replies
Last Post


