
Lots of pictures of pics of my 355 build from start to finish and buildsheet
 11-20-2005, 02:25 PM
#1
Registered User
Thread Starter

Join Date: Mar 2001
Location: Costa Mesa, CA
Posts: 2,521
Lots of pictures of pics of my 355 build from start to finish and buildsheet
Pictures first-
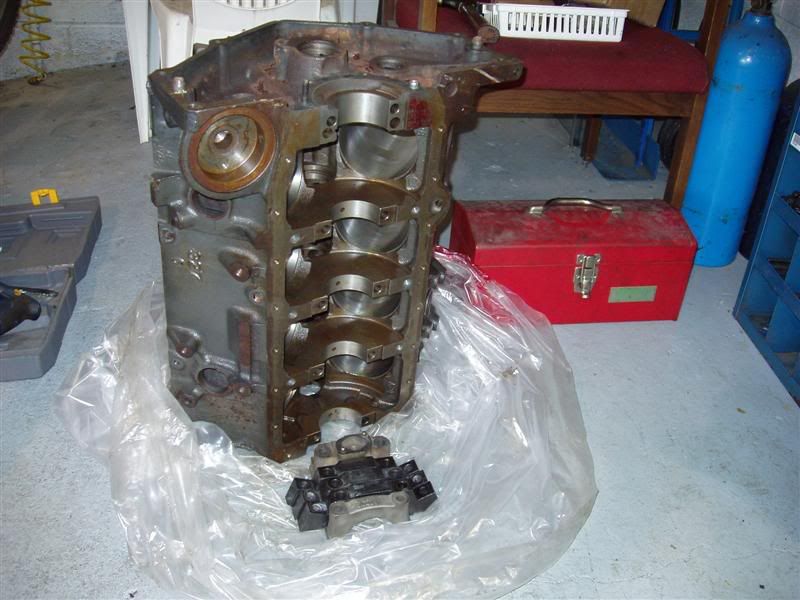
Freshly machined block with splayed 4 bolt mains (.030 over, decked .020)
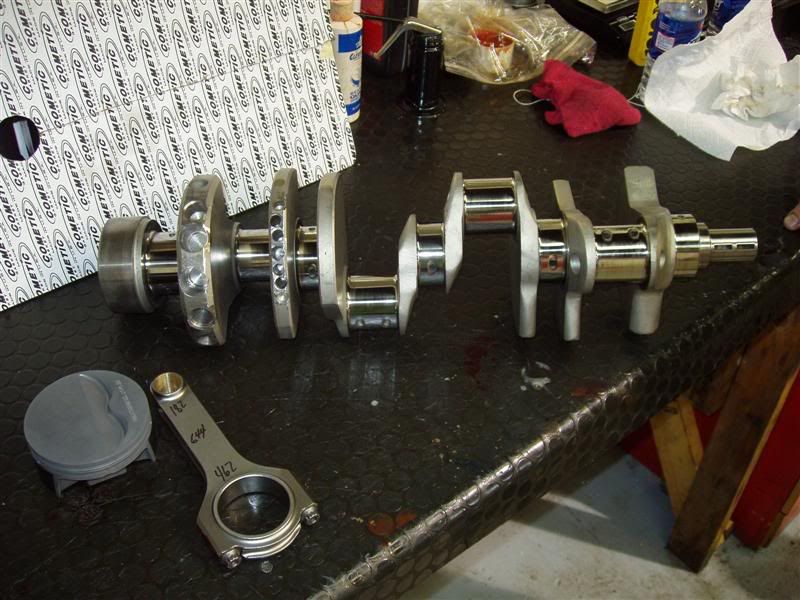
Eagle 4340 forged crank, Eagle 6" H-beam rod, Mahle forged piston-
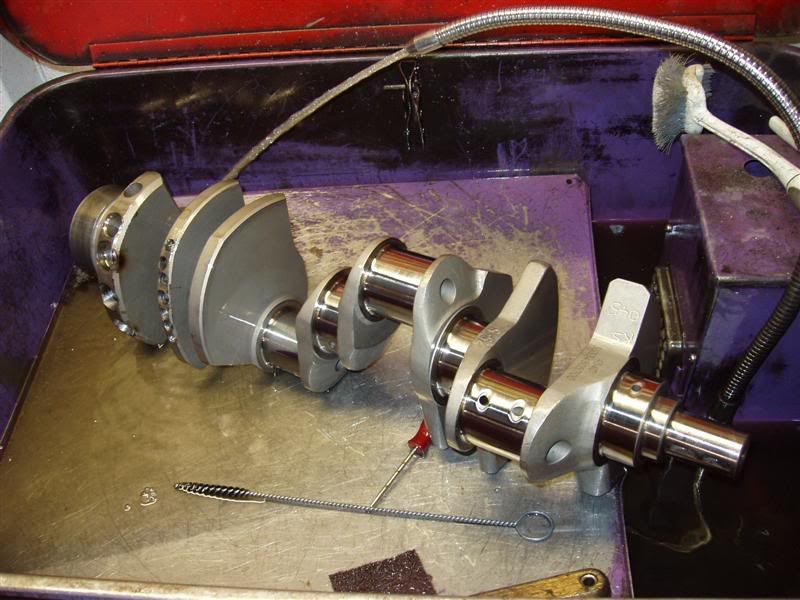
Cleaning the crank before assembly-
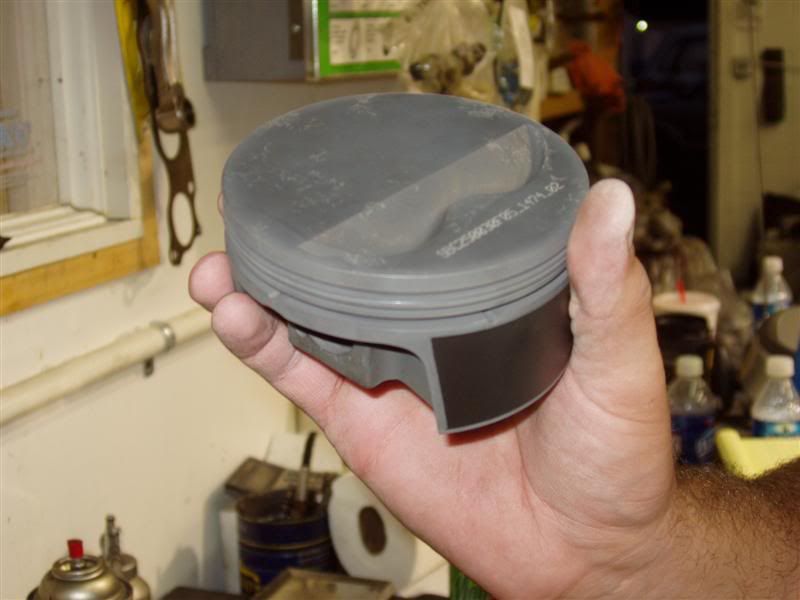
Closeup of Mahley piston-
Pistons on rods-
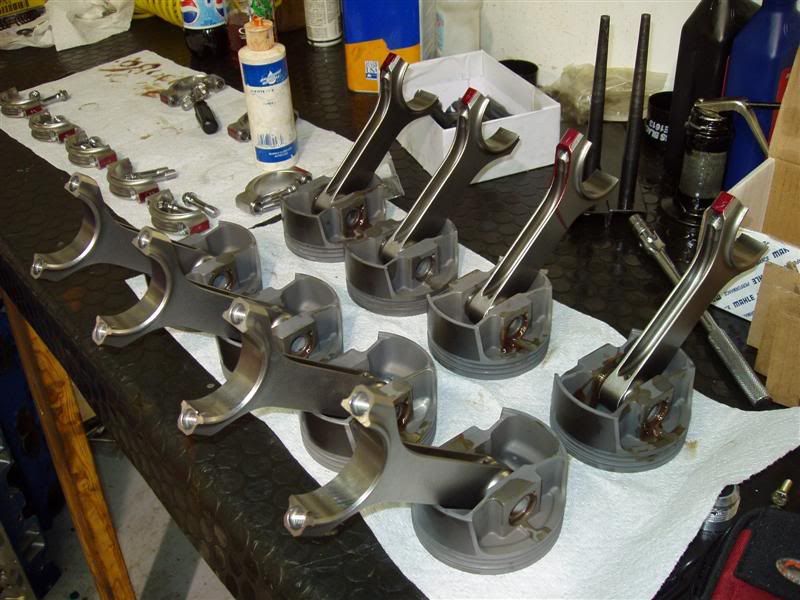
Fitting the rings-

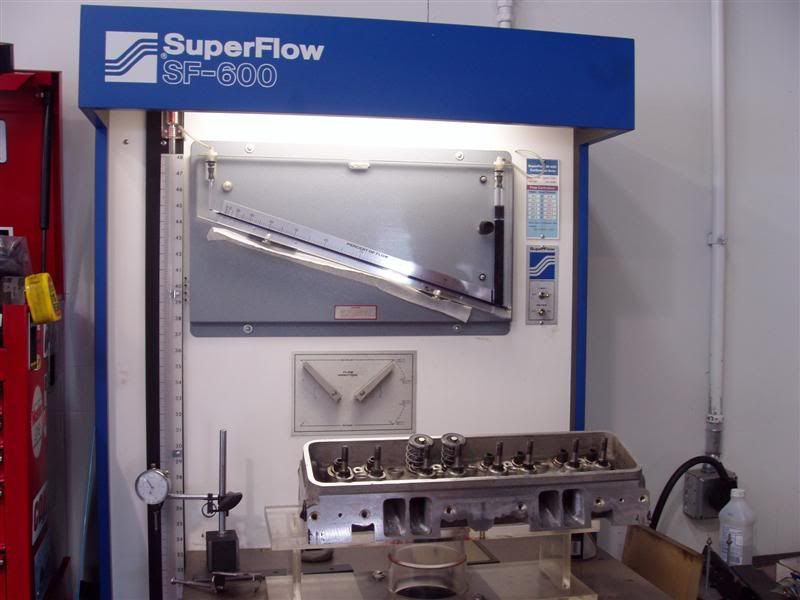
Head about to be flowed-
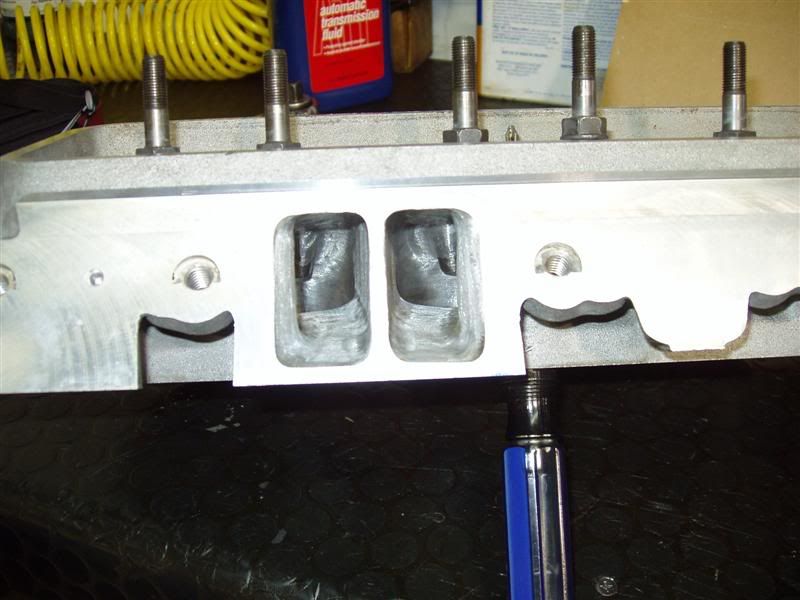
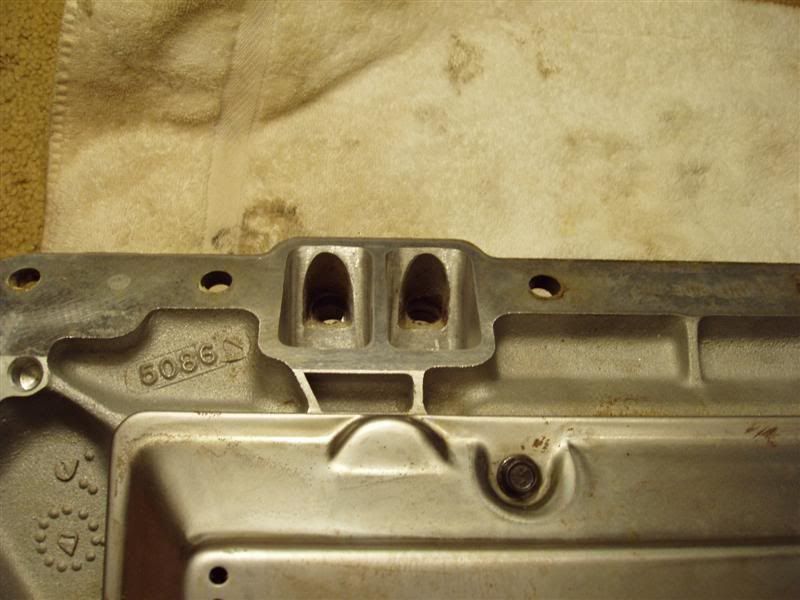
Intake ports-
Exhaust ports-
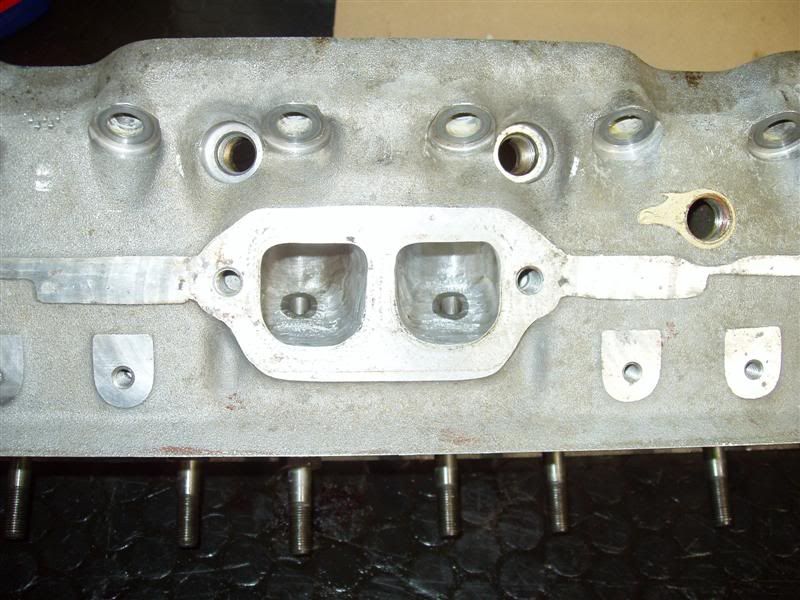
After some intake porting-
Freshly machined block with splayed 4 bolt mains (.030 over, decked .020)
Eagle 4340 forged crank, Eagle 6" H-beam rod, Mahle forged piston-
Cleaning the crank before assembly-
Closeup of Mahley piston-
Pistons on rods-
Fitting the rings-
Head about to be flowed-
Intake ports-
Exhaust ports-
After some intake porting-
 11-20-2005, 02:32 PM
#2
Registered User
Thread Starter
Join Date: Mar 2001
Location: Costa Mesa, CA
Posts: 2,521
Re: Lots of pictures of pics of my 355 build from start to finish and buildsheet
Assembled on the stand-
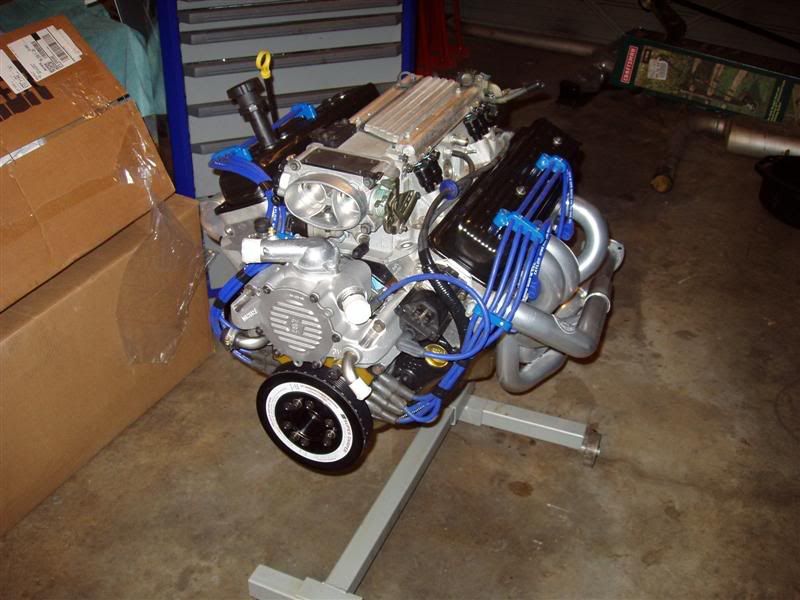
Motor on the subframe-
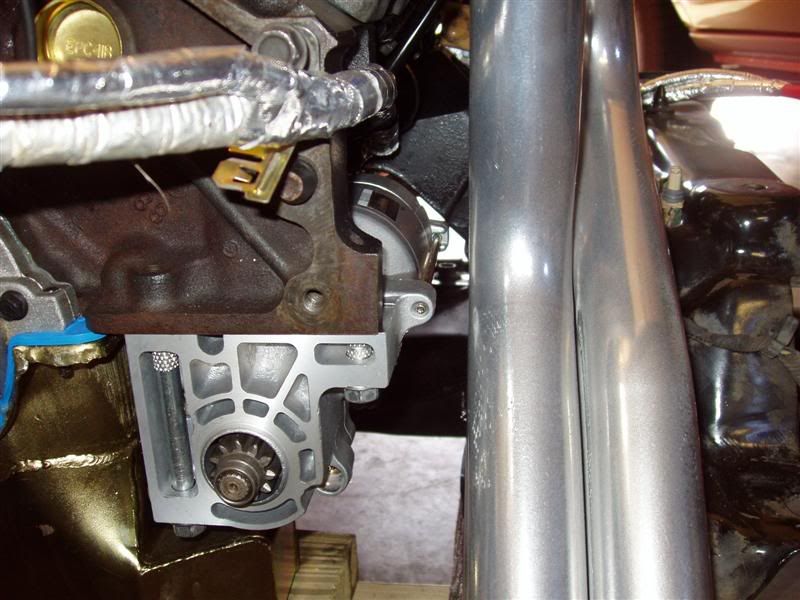
LT4 starter->Hooker Long Tube clearance-
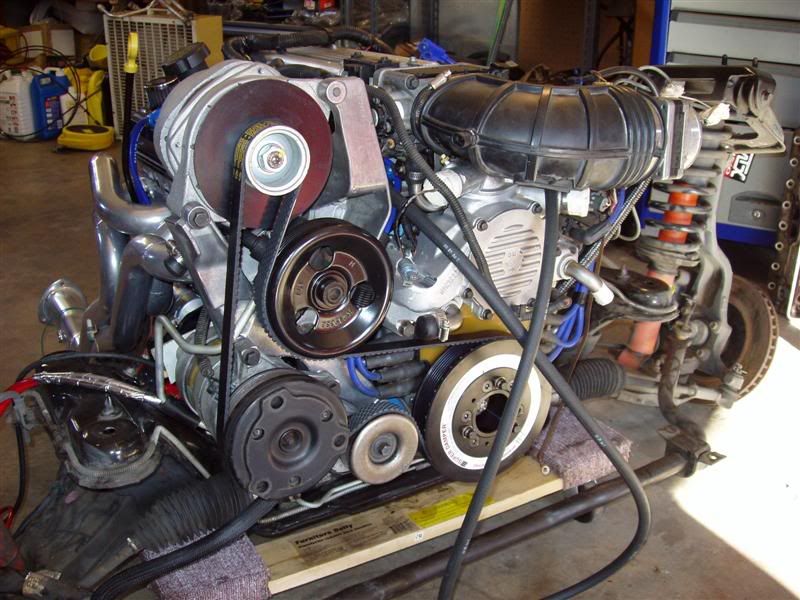
I got rid of the metal coolant crossover tube and replaced it with a fitting and hose on each side-

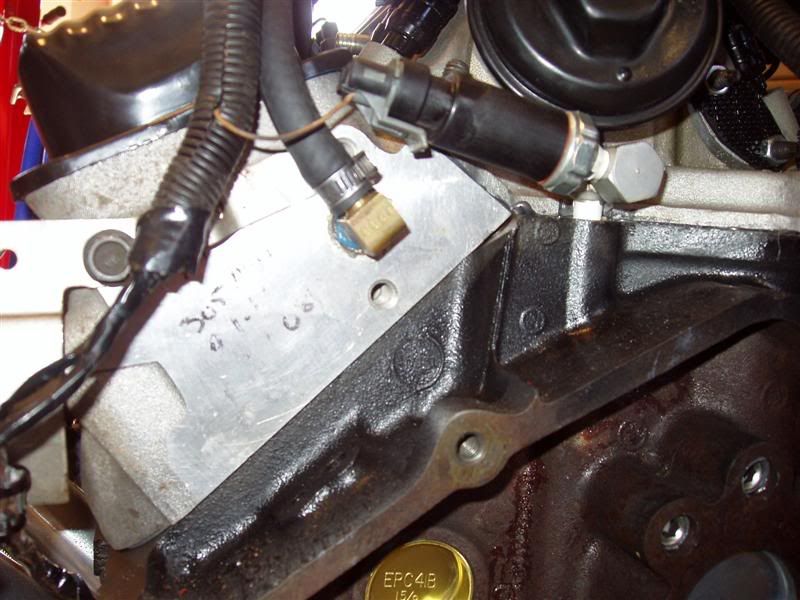
Other side, had to rotate the fitting a little to clear the oil pressure sensor-
Coolant hose routing-
Passenger side shot-

Low oil level sensor-> Hooker Long Tube clearance-
Rear shot-

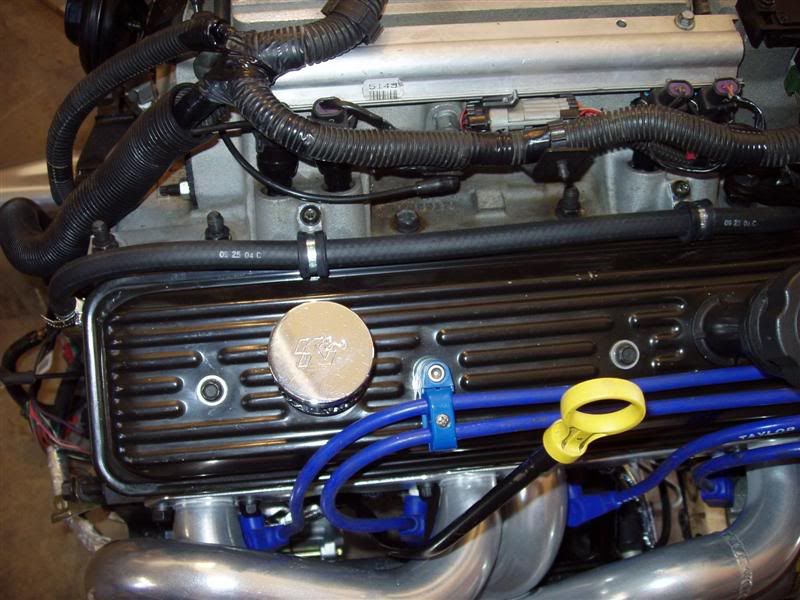
Heads flowed mid 240 intake, 180 exhaust before valve job and back cut. That was Manley Race flo intake valve and stock exhaust valve. Custom comp cam, 236/248 .608/.578 111 LSA with Comp R lifters (eek), beehive springs and GMPP 1.6 roller rockers. Despite the rockers supposedly being good up to .575 lift, they are working fine with this. Compression is around 11.3:1. The block was decked .020, and the heads milled .025- resulting in the intake manifold bolts not lining up properly. I had to take the die grinder and elongate the bolt holes so they would thread in. At this point I wish I had the intake milled, but later on when I put the spray to it, I'll just get another manifold, mill it and set it up for a direct port setup.
The block had to be clearanced for the Eagle H-beams in 3 places. I'm using Clevite H series bearings and a Melling standard volume oil pump with a 3/4" pickup to go along with the Canton road race oil pan.
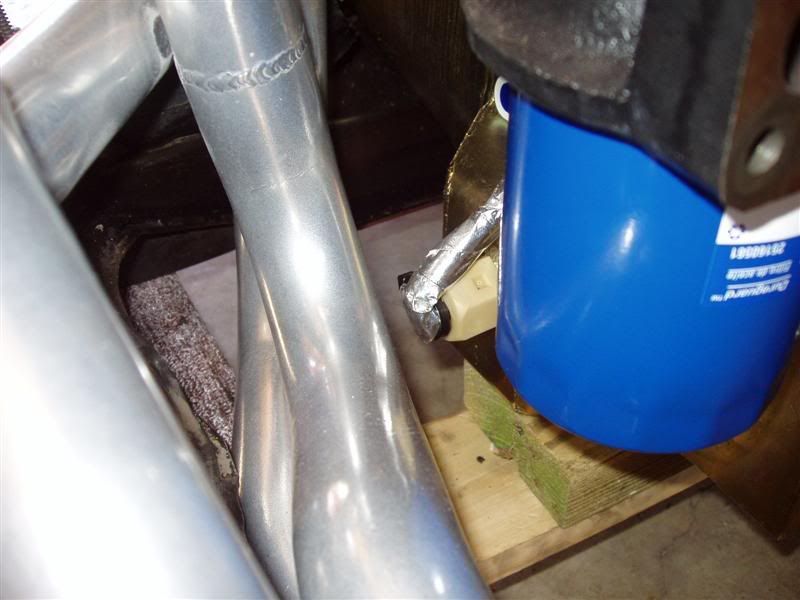
The freeze plug that goes behind the camshaft is seeping a little oil, and I need to get a "T" fitting so I can join the coolant crossover hoses joined and run to the radiator. Other than that it is ready to go in the car.
Motor on the subframe-
LT4 starter->Hooker Long Tube clearance-
I got rid of the metal coolant crossover tube and replaced it with a fitting and hose on each side-
Other side, had to rotate the fitting a little to clear the oil pressure sensor-
Coolant hose routing-
Passenger side shot-
Low oil level sensor-> Hooker Long Tube clearance-
Rear shot-
Heads flowed mid 240 intake, 180 exhaust before valve job and back cut. That was Manley Race flo intake valve and stock exhaust valve. Custom comp cam, 236/248 .608/.578 111 LSA with Comp R lifters (eek), beehive springs and GMPP 1.6 roller rockers. Despite the rockers supposedly being good up to .575 lift, they are working fine with this. Compression is around 11.3:1. The block was decked .020, and the heads milled .025- resulting in the intake manifold bolts not lining up properly. I had to take the die grinder and elongate the bolt holes so they would thread in. At this point I wish I had the intake milled, but later on when I put the spray to it, I'll just get another manifold, mill it and set it up for a direct port setup.
The block had to be clearanced for the Eagle H-beams in 3 places. I'm using Clevite H series bearings and a Melling standard volume oil pump with a 3/4" pickup to go along with the Canton road race oil pan.
The freeze plug that goes behind the camshaft is seeping a little oil, and I need to get a "T" fitting so I can join the coolant crossover hoses joined and run to the radiator. Other than that it is ready to go in the car.
11-20-2005, 02:40 PM
#3
Registered User

Join Date: Feb 2005
Location: Las Vegas
Posts: 188
Re: Lots of pictures of pics of my 355 build from start to finish and buildsheet
That looks very nice man! I wish mine would end up looking that pretty... but im lazy! What do you expect it to put down to the rear wheels and about how much do you have invested in the whole project. I think I have spent close to 8k so far on mine... but thats not all motor parts either.
11-20-2005, 02:40 PM
#4
Registered User
Join Date: Nov 2001
Location: Kansas
Posts: 3,516
Re: Lots of pictures of pics of my 355 build from start to finish and buildsheet
Who gave you the idea of changing the crossover tube on the heads? Im not sure if what you have done works thats why i ask.
Also, the taylor wires need rerouted around the alternator or they will be melted by the heat. Youll be back on here in a week saying how your car ran great and then all of a sudden its missing real bad but nothing is wrong with the plugs or wires.
Also, the taylor wires need rerouted around the alternator or they will be melted by the heat. Youll be back on here in a week saying how your car ran great and then all of a sudden its missing real bad but nothing is wrong with the plugs or wires.
11-20-2005, 03:08 PM
#6
Registered User
Thread Starter
Join Date: Mar 2001
Location: Costa Mesa, CA
Posts: 2,521
Re: Lots of pictures of pics of my 355 build from start to finish and buildsheet
Originally Posted by hallbilly
That looks very nice man! I wish mine would end up looking that pretty... but im lazy! What do you expect it to put down to the rear wheels and about how much do you have invested in the whole project. I think I have spent close to 8k so far on mine... but thats not all motor parts either.
My bill at the machine shop was about $4k even. It included ALL machine work, splayed 4 bolt conversion, setting up the heads, cleaning, eagle forged crank, eagle H beam rods, Mahle pistons, cam, lifters, springs, head gaskets and head studs. I spent about $800-$900 on the ceramic coated Hooker LT's, X pipe, dynomax bullets and related parts. The ATI super damper was $370 from Summit. The canton pan, pickup and pump was about the same price. The energy suspension motor mounts were about $55. The miscellaneous gaskets were about $70-80 and the LT4 extreme duty timing set was around $200-$250 (can't remember).
Originally Posted by turbo_Z
Who gave you the idea of changing the crossover tube on the heads? Im not sure if what you have done works thats why i ask.
Also, the taylor wires need rerouted around the alternator or they will be melted by the heat. Youll be back on here in a week saying how your car ran great and then all of a sudden its missing real bad but nothing is wrong with the plugs or wires.
Also, the taylor wires need rerouted around the alternator or they will be melted by the heat. Youll be back on here in a week saying how your car ran great and then all of a sudden its missing real bad but nothing is wrong with the plugs or wires.
I made a thread a few weeks ago about making an -AN setup instead of using the stock coolant crossover tube. I found these fittings in the garage, so instead of spending $150+ on some pretty -AN stuff, I decided to try this. One thing mentioned in the thread is that some bigger lines coming from the heads might help cool the rear of the head better. I don't see any reason why it wouldn't work, but if I'm missing something let me know.
Originally Posted by Jameslt1TA
Looks really good. How much longer untill you get it back in the car?
11-20-2005, 03:36 PM
#7
Registered User

Join Date: Jan 2001
Posts: 608
Re: Lots of pictures of pics of my 355 build from start to finish and buildsheet
Looks good, But I think turbo Z has a point about coolant crossover, You don't have it going from head to head in the rear which might be a problem.
11-20-2005, 03:42 PM
#8
Registered User
Thread Starter
Join Date: Mar 2001
Location: Costa Mesa, CA
Posts: 2,521
Re: Lots of pictures of pics of my 355 build from start to finish and buildsheet
If coolant is being forced out of the back of the heads I'm not sure why it would need to crossover instead of each head feeding forward separately. Maybe someone can say for sure, because if I do need to cross it over, it won't be that big of a deal. I was thinking that the factory had the coolant cross from the driver side to the passenger side and then forward so they would have one line running forward instead of two. Cost savings, ya know
11-20-2005, 04:08 PM
#9
Registered User
Thread Starter
Join Date: Mar 2001
Location: Costa Mesa, CA
Posts: 2,521
Re: Lots of pictures of pics of my 355 build from start to finish and buildsheet
Does anyone know what I can put around the cam freeze plug in the back to keep oil from seeping out around it?
11-20-2005, 04:36 PM
#10
Registered User
Join Date: Sep 2004
Location: Wyoming
Posts: 1,152
Re: Lots of pictures of pics of my 355 build from start to finish and buildsheet
You'll be just fine on the coolant lines. They will both still be going to the radiator.
Might be just a little bit more efficient if anything. Kinda the same concept as dual exhaust over a y-pipe and single outlet.
Might be just a little bit more efficient if anything. Kinda the same concept as dual exhaust over a y-pipe and single outlet.
11-20-2005, 04:53 PM
#11
Registered User
Join Date: Mar 2002
Location: Newark, Delaware
Posts: 3,634
Re: Lots of pictures of pics of my 355 build from start to finish and buildsheet
You had to clearance the block? I built my 355 with stock stroke crank, 6" Manley H-beams, and Ross nitrous pistons. I didn't notice any places where my rods came close to the block???? My Manleys look very similar to your Eagles. Gee, hope I didn't miss something. Eh, the pan's not bolted on yet anyway. I think I better check the clearance again.
BTW, nice pictures
Frank
My Manleys look very similar to your Eagles. Gee, hope I didn't miss something. Eh, the pan's not bolted on yet anyway. I think I better check the clearance again.BTW, nice pictures
Frank
11-20-2005, 05:51 PM
#12
Registered User
Thread Starter
Join Date: Mar 2001
Location: Costa Mesa, CA
Posts: 2,521
Re: Lots of pictures of pics of my 355 build from start to finish and buildsheet
Yea, three places on the pan rail needed clearancing. We spun the shortblock over and sure enough it was hitting in one place, and as we looked further it was hitting in two more. The Eagle H beams are the only ones that I know of that do this on the stock stroke, so hopefully you won't have to clearance.
 11-20-2005, 08:36 PM
#14
Banned

Join Date: May 2003
Location: LA (lower Alabama)
Posts: 6,661
Re: Lots of pictures of pics of my 355 build from start to finish and buildsheet
Nice Job,Sweeeeet.
First thing I want to say is Ya know they have BLUE plug wires for sale!!!!!!
Water plumbing will be fine.
Are those 1-3/4" headers? We just had our 1-7/8" modified to clear the air box and steering shaft. The problem with the air box was the #8 cyl would hit it and ya couldn't get the flange up to the bolt holes and the steering shaft wouldn't connect even with an LS1 steering shaft(no rag joint)
Ya will be better off trying to pull it out with a slide hammer and replace it. The cam isn't butt up to it so ya should have room. Or ya might try turning it on one side and collapse it on the other and pull it with vice grips. If ya don't replace it it will be an oil leak forever.
Hope she runs good for ya.
Last edited by 1racerdude; 11-20-2005 at 08:41 PM.
11-20-2005, 09:16 PM
#15
Registered User
Thread Starter
Join Date: Mar 2001
Location: Costa Mesa, CA
Posts: 2,521
Re: Lots of pictures of pics of my 355 build from start to finish and buildsheet
Originally Posted by JKDZ28
Looks freakin' good FastZ!
Originally Posted by 1racerdude
Nice Job,Sweeeeet.
First thing I want to say is Ya know they have BLUE plug wires for sale!!!!!!
Water plumbing will be fine.
First thing I want to say is Ya know they have BLUE plug wires for sale!!!!!!
Water plumbing will be fine.
 The car is that medium quasar blue, so the plug wires go along pretty well.
Originally Posted by 1racerdude
Are those 1-3/4" headers? We just had our 1-7/8" modified to clear the air box and steering shaft. The problem with the air box was the #8 cyl would hit it and ya couldn't get the flange up to the bolt holes and the steering shaft wouldn't connect even with an LS1 steering shaft(no rag joint)
Originally Posted by JKDZ28
Ya will be better off trying to pull it out with a slide hammer and replace it. The cam isn't butt up to it so ya should have room. Or ya might try turning it on one side and collapse it on the other and pull it with vice grips. If ya don't replace it it will be an oil leak forever.
Last edited by FastZinTennessee; 11-20-2005 at 09:22 PM.