
Metal shavings when installing cam bearings....
 04-24-2010, 10:30 AM
#1
Registered User
Thread Starter
Join Date: Mar 1999
Location: Kernersville, NC
Posts: 2,063
I started getting off topic in my other thread, so I decided give this issue it's own thread. First a couple of posts for oiling cam holes then I'll post up the shavings.
Just for kicks and thrills, I looked up the factory manual spec on where the oiling holes for the cam bearings are supposed to go. I also verified this by checking the oiling hole locations in my stock engine.
With the block right side up as installed in the car. These are the factory locations....
#1 - holes at 1 and 5 o'clock
#2 - hole at 5 o'clock
#3 - hole at 5 o'clock
#4 - hole at 5 o'clock
#5 - hole at 12 o'clock
The book "How to Rebuild Small Block Chevy LT1/LT4 Engines" states totally different positions. Here they are....
#1 - holes at 10 and 2 o'clock
#2 - hole at 2-3 o'clock
#3 - hole at 2-3 o'clock
#4 - hole at 2-3 o'clock
#5 - hole at 2-3 o'clock
I found this on Dura-Bond's site.....so the LT1/LT4 rebuild book seems to have the better clocking according to Dura-Bond.
http://www.dura-bondbearing.com/Port...20Bulletin.pdf
 04-24-2010, 10:31 AM
#2
Registered User
Thread Starter
Join Date: Mar 1999
Location: Kernersville, NC
Posts: 2,063
I did a practice run installing one of the old cam bearings I knocked out and was appalled at how many metal shavings were left in the oiling groove after I knocked the bearing back out again. I went in fairly square, but I'm really concerned with what I've seen. Even just knocking out the factory cam bearings created shavings. How do you get the shavings out of the oil grooves once the new bearing is installed?
Do I need to knock down the sharp edge of the oiling groove causing the shavings? None of it is good, but the 2nd picture really bothers me.....that's quite a long shaving. Was I simply out of square at some point with the bearing?

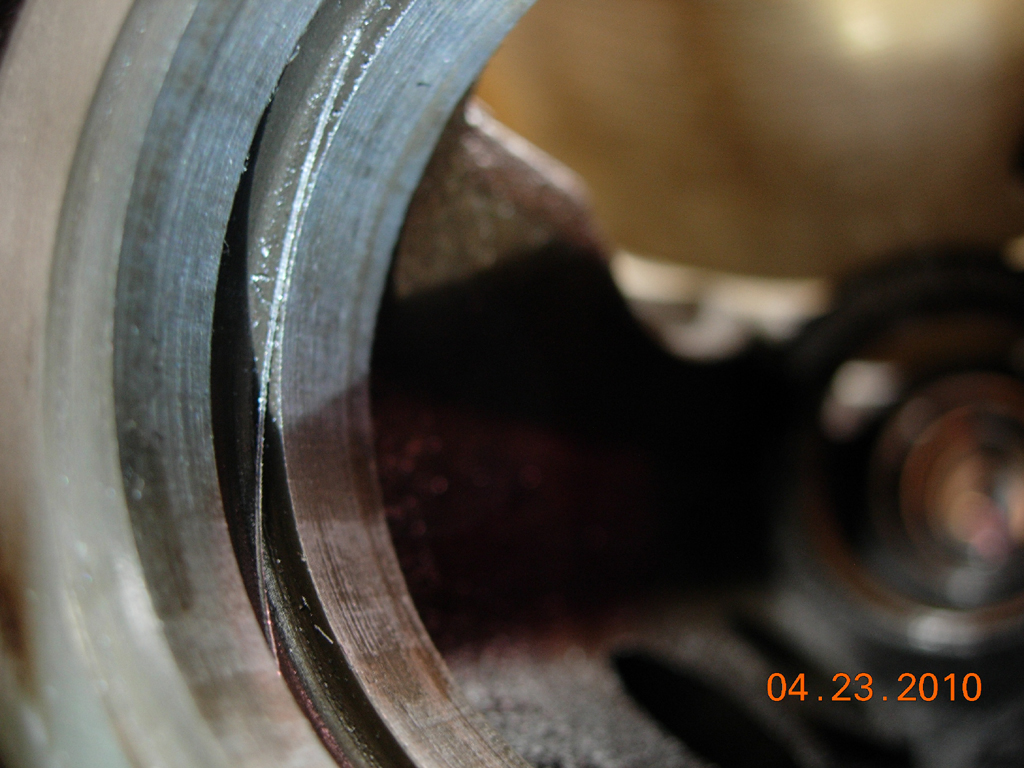
Do I need to knock down the sharp edge of the oiling groove causing the shavings? None of it is good, but the 2nd picture really bothers me.....that's quite a long shaving. Was I simply out of square at some point with the bearing?
Last edited by ACE1252; 04-24-2010 at 11:37 AM.
04-24-2010, 10:37 AM
#3
Registered User
Thread Starter
Join Date: Mar 1999
Location: Kernersville, NC
Posts: 2,063
In doing some more practicing, it seems I was not square. The picture above is bearing #1 and I installed it from the front with no real guide to square it. My Dad also tells me that I need to knock down that sharp edge of the oiling grooves to reduce the shavings. Strangely, part of that groove is chamfered while some of it is not.
I've read a couple of places to install the number 1 and 2 from the back, number 3, 4, and 5, from the front. The idea is to use the cam install tool to keep the bearing as square as possible(with the sliding guide on the tool).
Even doing this, there are still shavings that are generated from the interference fit. How to mitigate the shavings? Will drawing the bearing in create less shavings than hammering the thing in?
My present thought is that after I install the bearings, I install the old cam, lifters, oil pump, put the screen in a bucket of oil, and spin up the pump to try and flush the shavings out of the cam oiling grooves and out the main supply holes.
Last edited by ACE1252; 12-22-2011 at 01:30 AM.
04-24-2010, 11:20 AM
#4
Registered User
Join Date: Jun 2006
Location: New Brunswick,Canada
Posts: 919
Are you doing a complete rebuild? I've never just installed cam bearings in a running motor. But on the full rebuilds after you install the frost plugs and cam bearings, you wash out the whole block with soap and water and blow out the oil passages. That should clean out all the unwanted stuff in the block.
If your doing it in the car your method should work, but I'm not sure its needed.
Hope this helps.
If your doing it in the car your method should work, but I'm not sure its needed.
Hope this helps.
04-24-2010, 11:59 AM
#6
Registered User

Join Date: Jul 2000
Location: Three Oaks MI
Posts: 993
I prefer to pull them in. I made up a set of guides that sandwiches the bearing between 2 plugs and I use threaded rod attached to the back one and I pull the bearings in. The front plug centers the bearing .
04-24-2010, 01:05 PM
#7
Registered User
Join Date: Jan 2010
Location: western ky
Posts: 274
theres an order to where your cam bearings go.. they are marked on the box to which journal they go.. i've always put them in at 2:00
you will get some shavings when you press the bearings in,theres no way to avoid it.. i hope your using a cam bearing tool to install your bearings, if not you better go get one or your going to waste alot of money on camshafts if not more..
install bearings, wash block out to remove shavings/debris..
04-24-2010, 06:10 PM
#8
Registered User
Thread Starter
Join Date: Mar 1999
Location: Kernersville, NC
Posts: 2,063
Man, I've been working on this all day and I just don't see anyway for these things to go in without creating excessive shavings.....and enough to make me very scared.
Could the cam bearing bores be too small? How much of an interference fit should it be? How dangerous would it be to oil the cam bearing bore and the outside of the cam bearing before installation? Would I spin a bearing doing this? I've been installing them dry, but I simply don't like what I'm seeing.
Could the cam bearing bores be too small? How much of an interference fit should it be? How dangerous would it be to oil the cam bearing bore and the outside of the cam bearing before installation? Would I spin a bearing doing this? I've been installing them dry, but I simply don't like what I'm seeing.
Last edited by ACE1252; 04-24-2010 at 07:35 PM.
04-24-2010, 07:49 PM
#9
Registered User
Join Date: Jan 2010
Location: western ky
Posts: 274
install them dry, just clean the block..
you do have to make sure your putting the correct bearing in the correct bore.. you dont just throw them in any order.. on durabond they are marked on the box in which bore/journal they go..
use a cam installation tool to make sure theyre squared in the bores.
you do have to make sure your putting the correct bearing in the correct bore.. you dont just throw them in any order.. on durabond they are marked on the box in which bore/journal they go..
use a cam installation tool to make sure theyre squared in the bores.
04-24-2010, 10:37 PM
#10
Registered User
Join Date: May 2004
Location: Bay Area, CA
Posts: 2,001
File and polish the leading sharp edge with fine grit sandpaper on the bearing, same for the block. Use a little wd40 on the bearing.
Drawing the bearings in is the best way, but the standard installation tools do a fine job if you prep the bearing and block properly, you shouldn't get those big shards of metal, maybe a few little chips but that's it.
Drawing the bearings in is the best way, but the standard installation tools do a fine job if you prep the bearing and block properly, you shouldn't get those big shards of metal, maybe a few little chips but that's it.
12-15-2011, 07:46 PM
#11
Registered User
Thread Starter
Join Date: Mar 1999
Location: Kernersville, NC
Posts: 2,063
Re: Metal shavings when installing cam bearings....
I'm bumping an old thread, but I didn't realize that I forgot to post up what I did to solve the problem of these shavings.
I ended up using a flexible dremel tool attachment, a dremel, and dremel scotchbrite wheels to break the sharp edges of the oil grooves. I simply ran the scotchbrite wheel in and around the oiling grooves(not the cam bore surface) until they didn't feel sharp to my finger anymore. The wheels were wide enough to fit into the oiling groove and break the edges without getting too far onto the cam bore bearing surface.
Now follows an extremely important warning.
Scotchbrite is made of a material that will break down into small enough particles to pass through an oil filter. I'm going to repeat that.....Scotchbrite is made of a material that will break down into small enough particles to pass through an oil filter. If you don't wash the block, the scotchbrite material that is left behind will eat your new bearings.
DO NOT do what I did unless you plan on washing the block(soap and water) THOROUGHLY after finishing this procedure. Wash the block(with rifle brushes, the whole works) before installing any of the bearings. Knock out all oil galley plugs, cam plug, and core plugs before washing as well.
I bought some cheap LT1 cam bearings to test with on each position to make sure I had "broke" the edge enough to minimize the shavings.
After all the above, you can install the new cam bearings.
It came out well. I ended up with just a few shards coming off as opposed to the major shavings in my pictures above.
Last edited by ACE1252; 04-25-2016 at 10:05 PM.
12-15-2011, 08:19 PM
#12
Registered User

Join Date: Feb 2005
Location: Metro Detroit, MI
Posts: 1,326
Re: Metal shavings when installing cam bearings....
Just pay a machine shop. I paid 35 to have my cam bearings R&R. With a price that low it hardly seems worth it to do the job myself and deal with the expensive tool.
12-15-2011, 08:20 PM
#13
Registered User
Thread Starter
Join Date: Mar 1999
Location: Kernersville, NC
Posts: 2,063
Re: Metal shavings when installing cam bearings....
Yes it is more expensive, but I wanted to learn how to do it myself. Just passing on what I've learned to help others who want to learn.
12-22-2011, 01:46 AM
#15
Registered User
Thread Starter
Join Date: Mar 1999
Location: Kernersville, NC
Posts: 2,063
Re: Metal shavings when installing cam bearings....
Yeah, practice really does help get the feel of it. The more expensive cam tools with the rubber surface is better than the cheap ones with just the o-rings. I had the cheaper one and got it to work fine, but you have to be very careful when installing and removing it from the cam bearing as not to scratch the bearing surface.
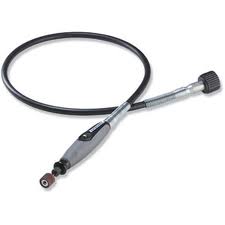
For more reference, here are pictures of what I used to break the oiling groove edges. The dremel attachment fits in the cam bores really well.
Dremel attachment:
Dremel Scotchbrite wheels:

For more reference, here are pictures of what I used to break the oiling groove edges. The dremel attachment fits in the cam bores really well.
Dremel attachment:
Dremel Scotchbrite wheels:
Last edited by ACE1252; 12-30-2011 at 05:47 AM.