
Optispark protection


 02-20-2009, 08:56 AM
#19
Registered User
Join Date: Nov 2006
Location: Houston(clear lake)
Posts: 869
The high voltage in the cap/rotor section creates ozone. Ozone appears to cause the rust the eventually blinds the optical sensor. I wouldn't seal it up completely.... that will just insure maximum ozone concentration in the housing. GM added the "vent" system to remove the ozone, not moisture.
Find the article on the Corvette website that shows how to add a "vent" to the unvented Opti.
Find the article on the Corvette website that shows how to add a "vent" to the unvented Opti.
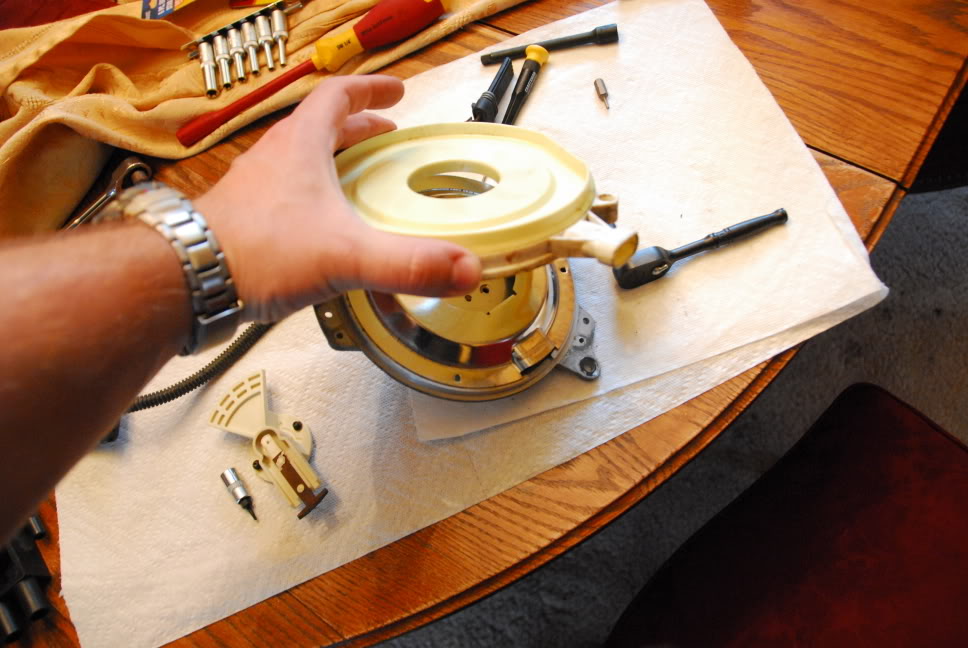
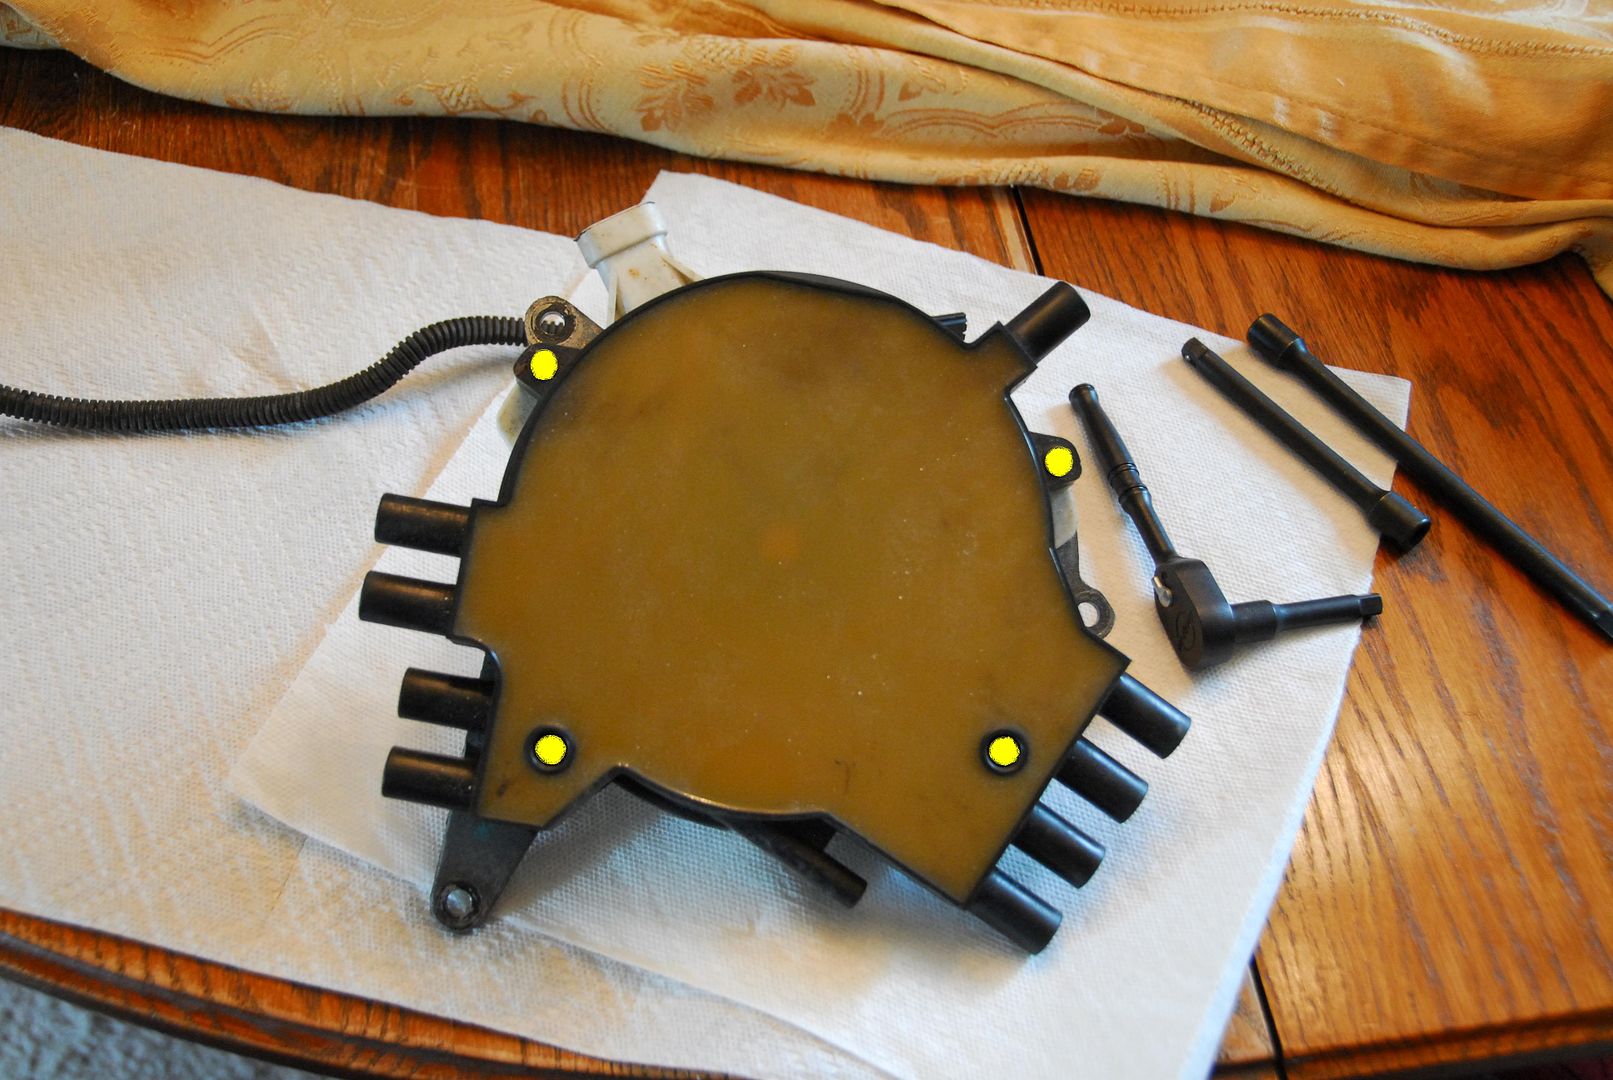
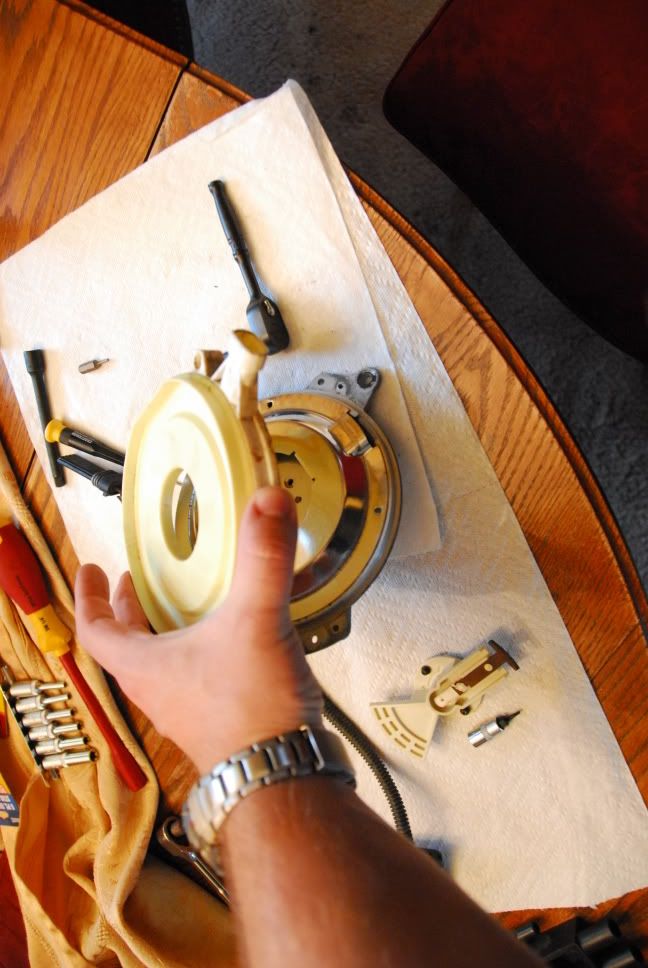
Also here are pics of me taking mine apart. This a GM unit by the way.
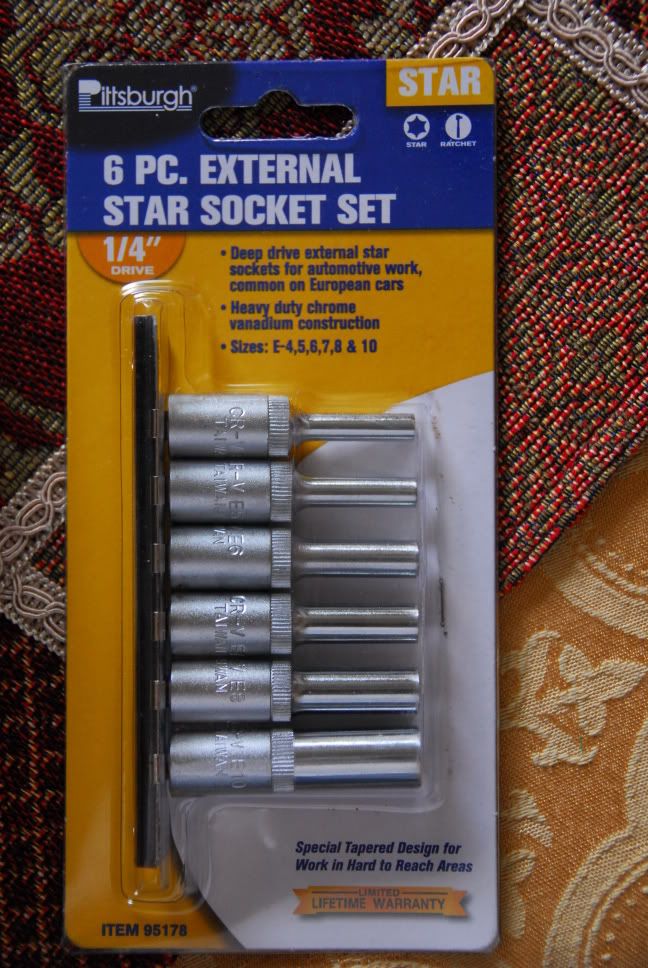
This is what I used to take the bolts off. I purchased this at local harbor freight/china mall I believe it is the E-4 socket that you need, if I remember correctly.

The yellow are the bolts.

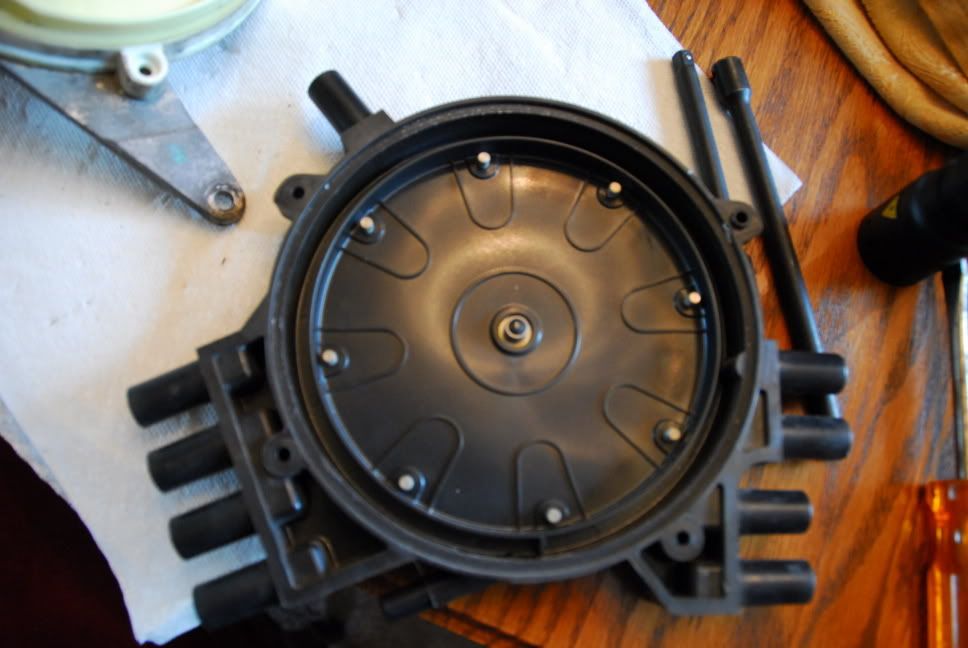
At this point I had to carefully pry the opti apart. (I used a flathead screwdriver and twisted it in between certain areas, to seperate.) You can see that also seperated the plastic cap and rotor and the other white plastic portion.

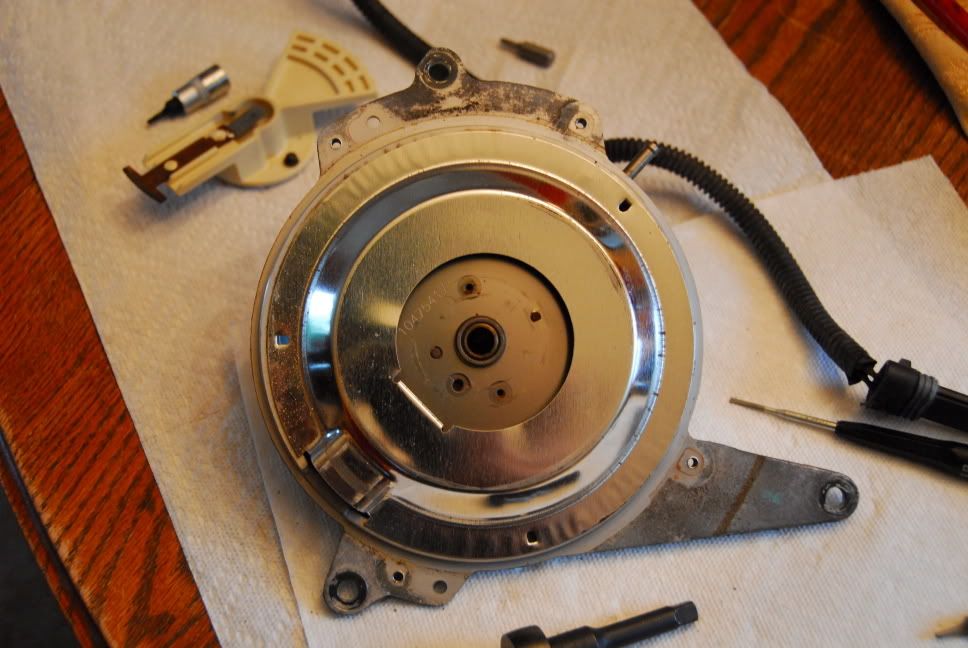
Here is the vented cap removed.

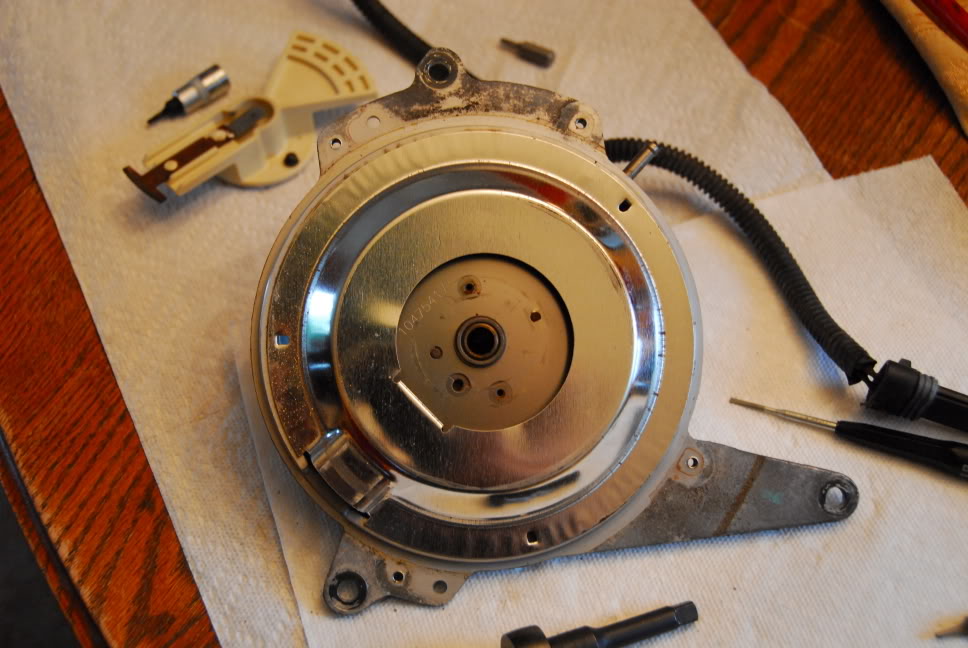
Here is a pic of rotor after underneath after cap removal.

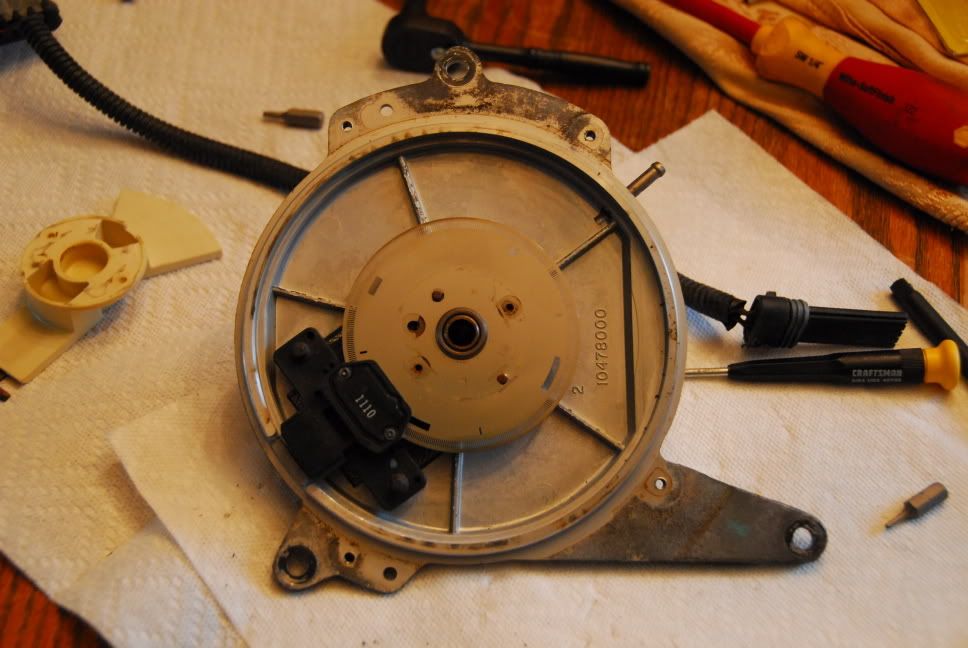
Here is my rotor after removal. Also I dont care what anybody says my screws were loctited from factory. There was residual amount of dried factory style loctite on bolts along with optical wheel where screws were removed. (It is always better to be safe than sorry, but I wanted to add what I found, because I have heard that they never get loctited from factory)

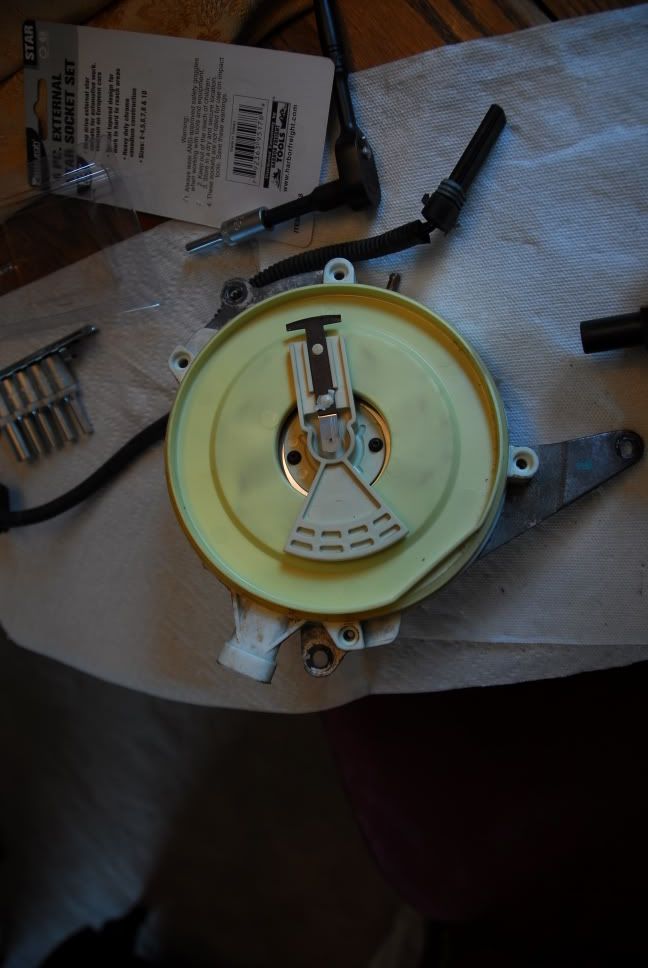
Here is removal of next portion after rotor.
This is a metal cover that comes off by hand.
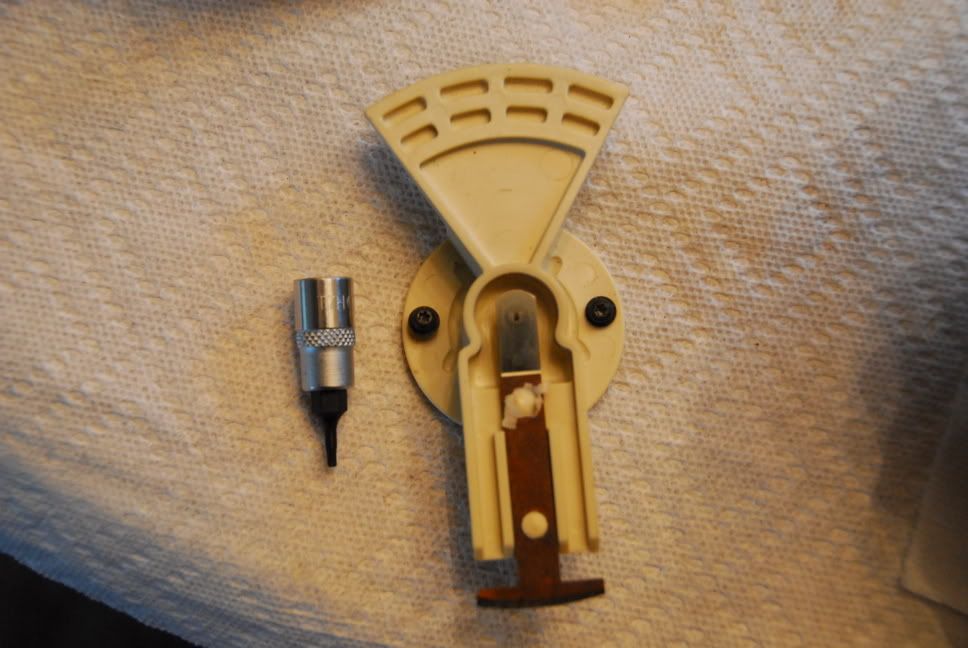
Optical sensor and wheel. (note that the sensor is a mitisubishi sensor that I have heard is used in other vehicles.)

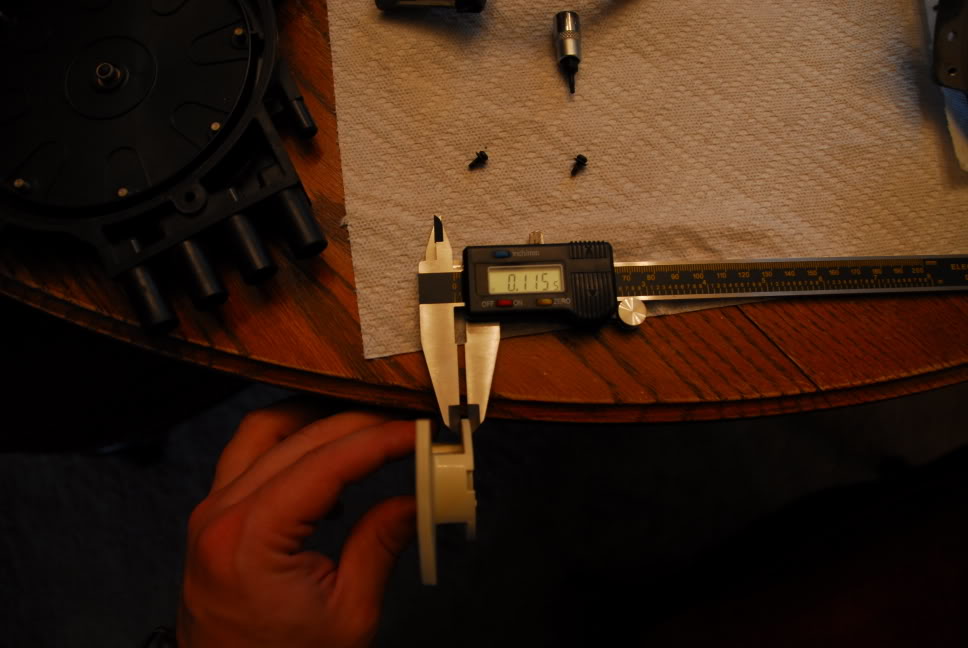
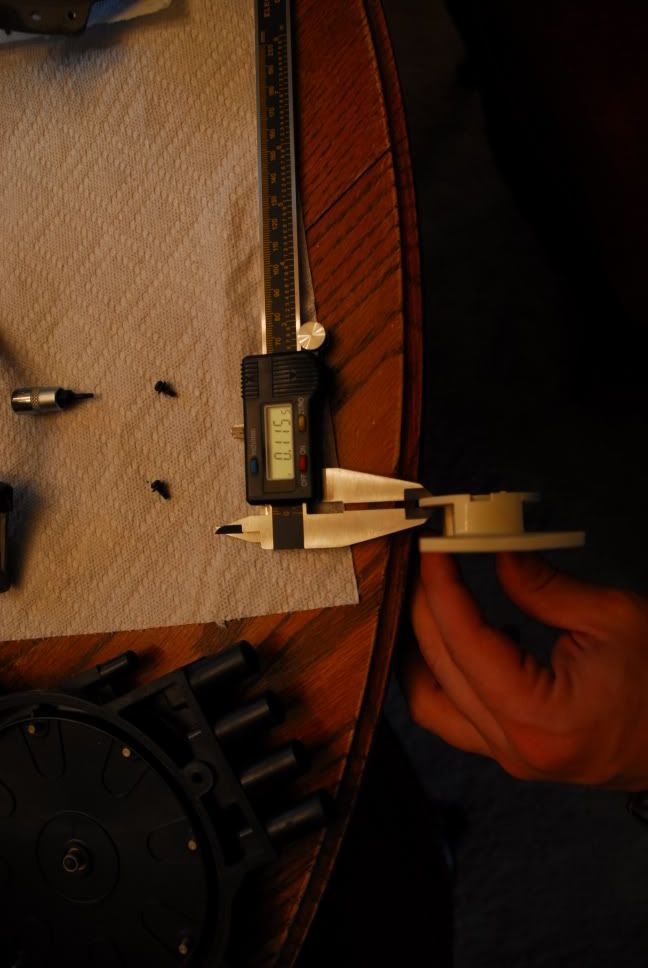
In this case I am replacing the rotor with a washer that will be drilled . (this is for LTCC coil conversion) I measured the thickness of rotor to try mimic that with a washer.
Last edited by Dave1980; 02-20-2009 at 11:56 AM.
02-20-2009, 02:15 PM
#20
Registered User
Thread Starter

Join Date: Apr 2008
Location: College Station, Tx
Posts: 404
I asked my mechanic if he could fab up some sort of vent system on my unvented opti while he had the front of my car all over his shop. He said he would check into it.
On a side note, are pittsburg tools good? There's a harbor freight around here and saw most of there tools are pittsburg and I didn't want to by a cheap husky like tool. Do they compare to craftsman?
On a side note, are pittsburg tools good? There's a harbor freight around here and saw most of there tools are pittsburg and I didn't want to by a cheap husky like tool. Do they compare to craftsman?
02-20-2009, 09:58 PM
#21
Registered User
Join Date: Nov 2006
Location: Houston(clear lake)
Posts: 869
I asked my mechanic if he could fab up some sort of vent system on my unvented opti while he had the front of my car all over his shop. He said he would check into it.
On a side note, are pittsburg tools good? There's a harbor freight around here and saw most of there tools are pittsburg and I didn't want to by a cheap husky like tool. Do they compare to craftsman?
On a side note, are pittsburg tools good? There's a harbor freight around here and saw most of there tools are pittsburg and I didn't want to by a cheap husky like tool. Do they compare to craftsman?
Harbor freight can be hit or miss. I have had things that lasted and would not die, that were a great deal. I have also had things that I plugged in and it died within minutes. The good thing about harbor freight is that you can get odd job tools cheap.
Last edited by Dave1980; 02-20-2009 at 10:00 PM.
06-05-2009, 05:02 PM
#22
Registered User
Join Date: Apr 2002
Location: Oak Ridge, TN USA
Posts: 795
So your saying if you just run the optical portion, that it is ok to completely seal it up?
Also here are pics of me taking mine apart. This a GM unit by the way.
This is what I used to take the bolts off. I purchased this at local harbor freight/china mall I believe it is the E-4 socket that you need, if I remember correctly.
The yellow are the bolts.
At this point I had to carefully pry the opti apart. (I used a flathead screwdriver and twisted it in between certain areas, to seperate.) You can see that also seperated the plastic cap and rotor and the other white plastic portion.

Here is the vented cap removed.
Here is a pic of rotor after underneath after cap removal.
Here is my rotor after removal. Also I dont care what anybody says my screws were loctited from factory. There was residual amount of dried factory style loctite on bolts along with optical wheel where screws were removed. (It is always better to be safe than sorry, but I wanted to add what I found, because I have heard that they never get loctited from factory)
Here is removal of next portion after rotor.
This is a metal cover that comes off by hand.
Optical sensor and wheel. (note that the sensor is a mitisubishi sensor that I have heard is used in other vehicles.)
In this case I am replacing the rotor with a washer that will be drilled . (this is for LTCC coil conversion) I measured the thickness of rotor to try mimic that with a washer.
Also here are pics of me taking mine apart. This a GM unit by the way.
This is what I used to take the bolts off. I purchased this at local harbor freight/china mall I believe it is the E-4 socket that you need, if I remember correctly.
The yellow are the bolts.
At this point I had to carefully pry the opti apart. (I used a flathead screwdriver and twisted it in between certain areas, to seperate.) You can see that also seperated the plastic cap and rotor and the other white plastic portion.
Here is the vented cap removed.
Here is a pic of rotor after underneath after cap removal.
Here is my rotor after removal. Also I dont care what anybody says my screws were loctited from factory. There was residual amount of dried factory style loctite on bolts along with optical wheel where screws were removed. (It is always better to be safe than sorry, but I wanted to add what I found, because I have heard that they never get loctited from factory)
Here is removal of next portion after rotor.
This is a metal cover that comes off by hand.
Optical sensor and wheel. (note that the sensor is a mitisubishi sensor that I have heard is used in other vehicles.)
In this case I am replacing the rotor with a washer that will be drilled . (this is for LTCC coil conversion) I measured the thickness of rotor to try mimic that with a washer.
Thanks!
mike

Thread
Thread Starter
Forum
Replies
Last Post
[Interior] Interior protection
themex2002
2010 - 2015 Camaro Interior, Exterior, Paint & Body, Electronics/Car Audio
1
09-02-2015 03:47 PM