...??? Ripped upper shock mount?
 10-12-2008, 11:15 PM
#16
Administrator
Join Date: Nov 1998
Location: Hell was full so they sent me to NJ
Posts: 70,738
Here's a pic of all the components used on the stock shock. The large washer in the picture is intended to fit over the top of the shock and protect it. Appears your shocks have a nubby that prevents the washer from sitting flush with the top of the shock. Not clear what function (if any) the washer is providing in your photo. Is it just slipped over the shaft and hanging loose?

Last edited by Injuneer; 12-28-2008 at 10:50 PM.
 10-13-2008, 12:21 AM
#17
Registered User
Thread Starter
Join Date: Apr 2005
Location: Colorado Springs, CO
Posts: 1,830
Here's a pic of all the components used on the stock shock. The large washer in the picture is intended to fit over the top of the shock and protect it. Appears your shocks have a nubby that prevents the washer from sitting flush with the top of the shock. Not clear what function (if any) the washer is providing in your photo. Is it just slipped over the shaft and hanging loose?

The washer should spread out the load on the lower section of the upper shock mount. Instead of just riding on the center piece the washer should distribute the load onto the rubber ring around the center shaft.
Is there something else that should be there instead of the washer?
10-13-2008, 10:54 PM
#18
Administrator
Join Date: Nov 1998
Location: Hell was full so they sent me to NJ
Posts: 70,738
But the stock shock rides only on the metal ferrule in the upper shock mount. So do my QA1's. No large washer. There is the dust cover on the stock shocks, with the jounce bumper rubber inside it, and that may serve the same function as the large washer. I can't remember if that rides against the lower portion of the shock mount. In any case, the QA1'a have been in there for 11 years with no torn upper mounts.

10-13-2008, 11:38 PM
#19
Registered User
Thread Starter
Join Date: Apr 2005
Location: Colorado Springs, CO
Posts: 1,830
I called Sam today and he confirmed that the large washer needs to be between the bottom of the upper shock mount and the top of the shock to provide some load distribution on the shock mount.
I got everything buttoned up today but didn't get a chance to take her for a spirited test drive due to some rain. Hopefully tomorrow I will see if this fixed my "bouncy shocks".
I got everything buttoned up today but didn't get a chance to take her for a spirited test drive due to some rain. Hopefully tomorrow I will see if this fixed my "bouncy shocks".
10-14-2008, 08:03 AM
#20
Registered User

Join Date: Jun 2000
Location: Austin, TX. USA
Posts: 451
When I took mine apart, the rust was so bad on the mount I'm sure they would have given out in a few more years. I wire brushed and used rust killing paint before I put them back together. The shock nut was rusted on as well, of course. I had to get some help getting the old one off. We don't have salt to contend with here either, it was just water that had pooled on top of the shock tower from driving in the rain. I noticed that the new (stock) shocks now have stainless hardware so I guess it has been a common problem.
10-14-2008, 04:15 PM
#21
Registered User

Join Date: Mar 2002
Location: IL
Posts: 1,290
LT1powr-Do you have a part# for that dogbone? I got the rubber mount today at napa, and they didn't have, nor find that "dogbone" part at all...
Any tips with replacing this mount? Im a newbie at struts/front suspension..
Any tips with replacing this mount? Im a newbie at struts/front suspension..
10-15-2008, 03:45 PM
#24
Registered User
Join Date: Nov 2007
Location: Central Valley, California
Posts: 696
But the stock shock rides only on the metal ferrule in the upper shock mount. So do my QA1's. No large washer. There is the dust cover on the stock shocks, with the jounce bumper rubber inside it, and that may serve the same function as the large washer. I can't remember if that rides against the lower portion of the shock mount. In any case, the QA1'a have been in there for 11 years with no torn upper mounts.

The factory dust boot assembly which contains the bumpstop has the large washer basically built in (the metal piece the bumpstop fits in ).
10-19-2008, 01:46 AM
#25
Registered User
Join Date: Jul 2002
Location: The Land of Pleasant Living
Posts: 1,581
I've seen it before, about a week ago when I had to do my shocks! One of them had ripped right through, exactly like that. My car isn't lowered that I know of either. Now I need lower control arm busings. Are there any stiffer bushing out there for these cars, that don't squeak like hell? Or tubular lower a-arms that won't cost me an arm & a leg?
12-27-2008, 10:45 PM
#26
Registered User

Join Date: Mar 2005
Location: Raleigh, N.C.
Posts: 152
I'm putting my camaro back together and I can't remember if there is another round rubber bushing that fits between the "dogbone" piece and the body of the vehicle.
12-28-2008, 12:28 PM
#28
Registered User
Join Date: Mar 2005
Location: Raleigh, N.C.
Posts: 152
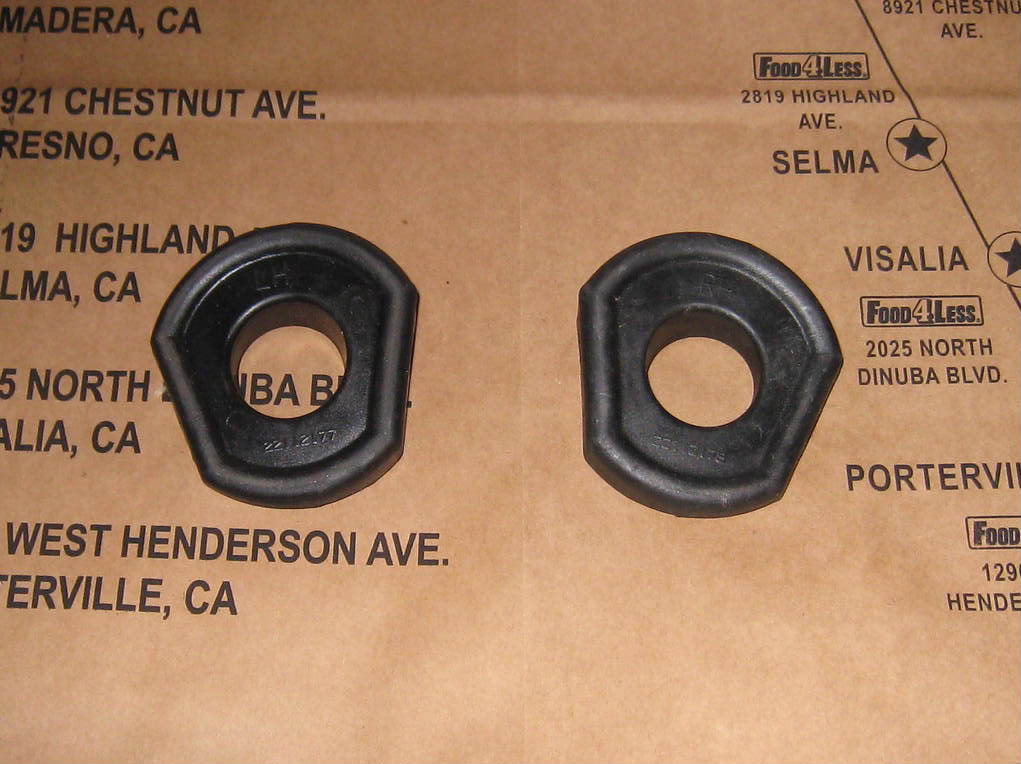
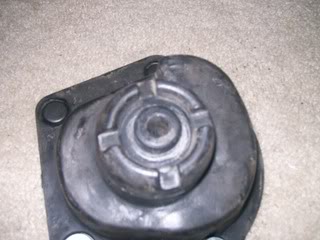
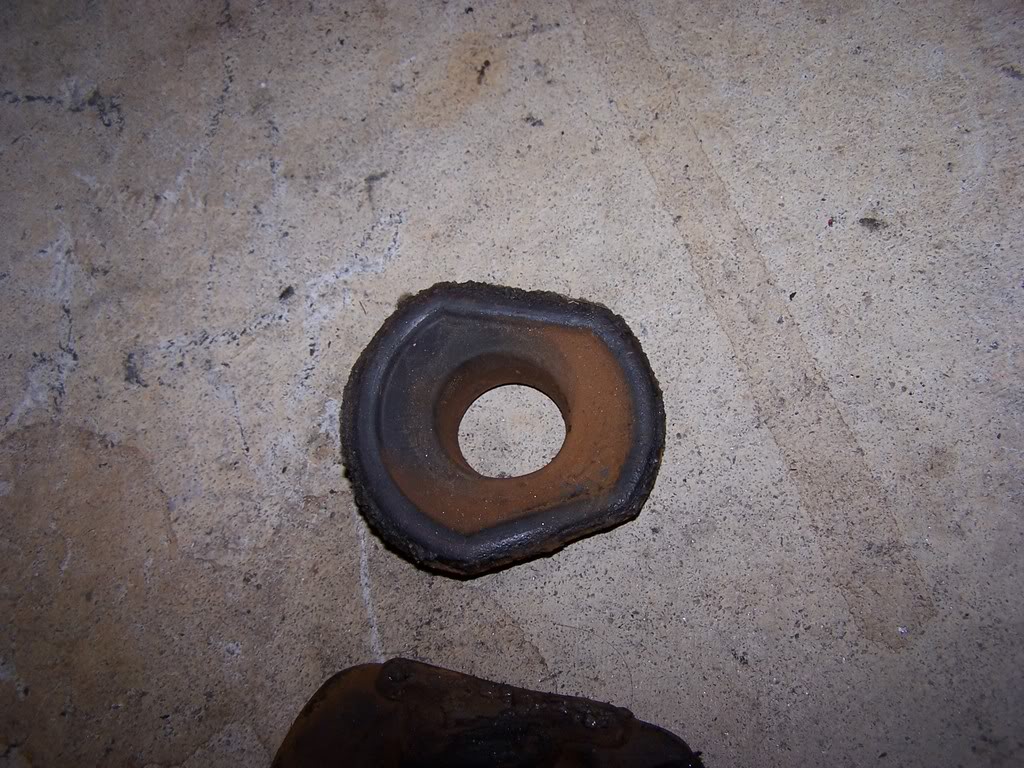
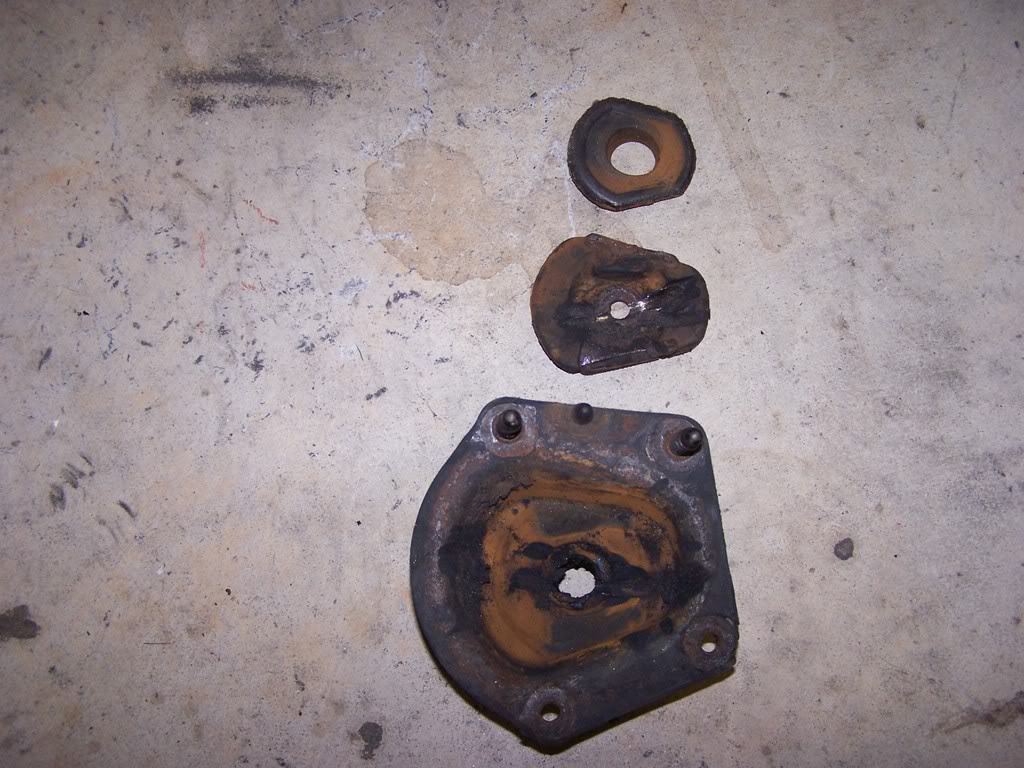
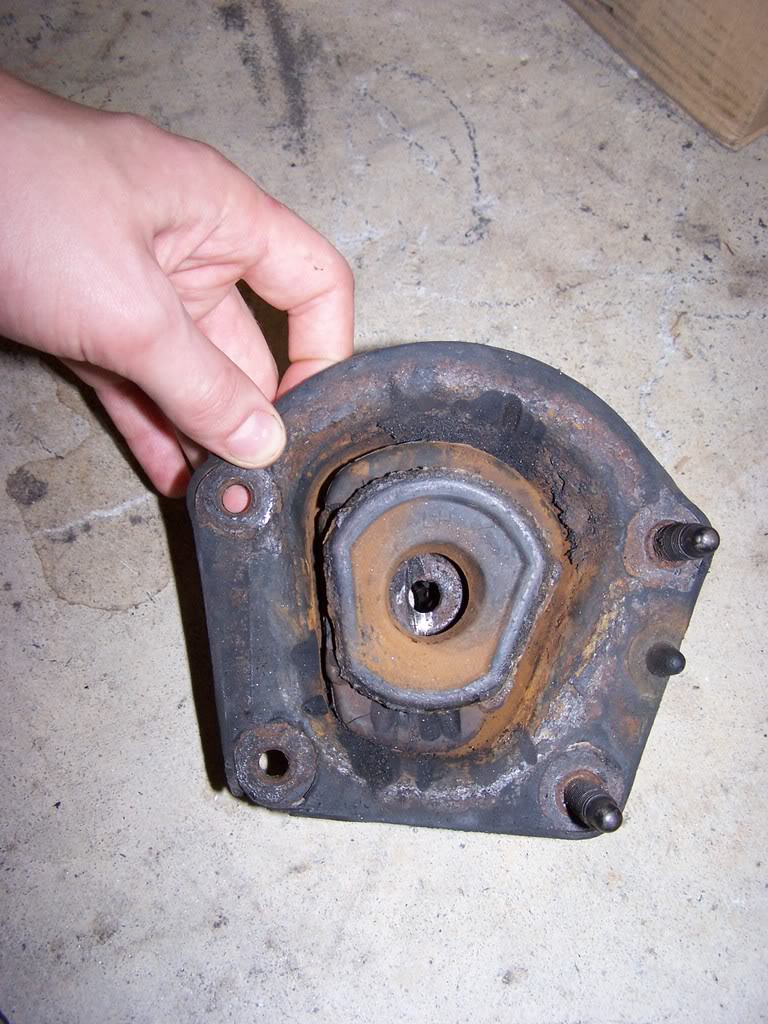
Well I have some pictures here because I really need to know where this extra piece goes...and where I can find a new one because my existing one is covered in rust and dry rot.
1. Here is the piece:
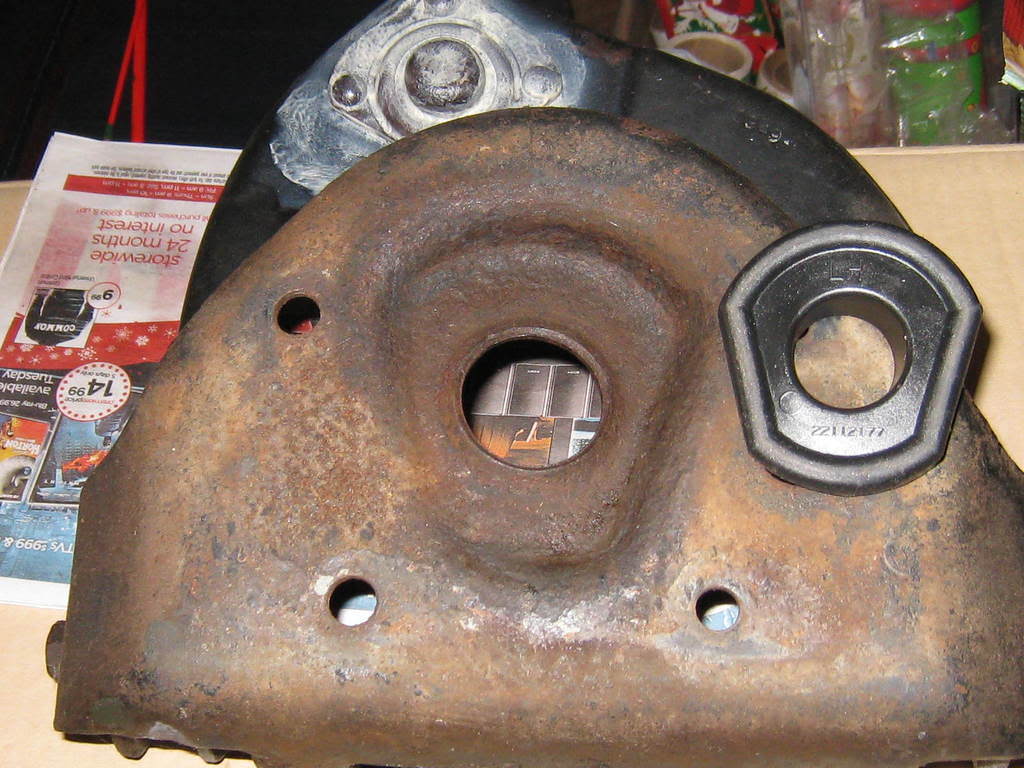
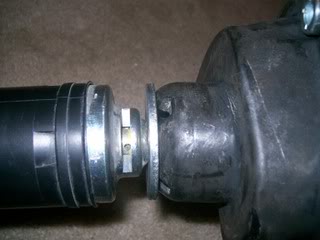
2. Here's how I think it goes back together:
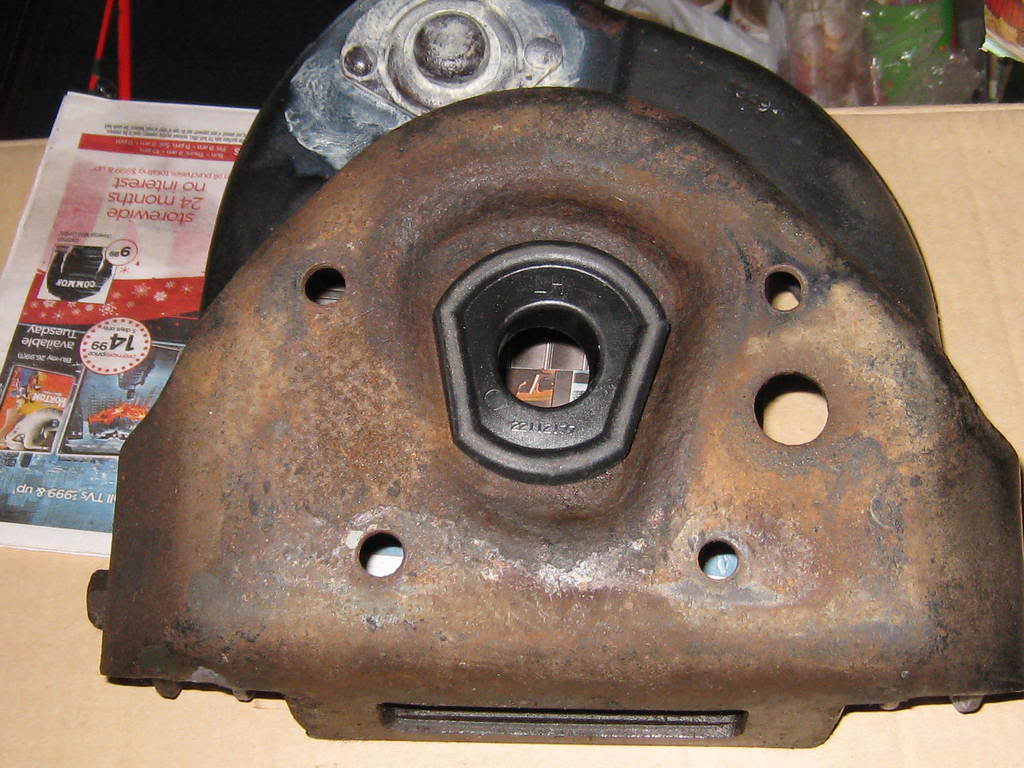
3. It looks like it fits right in there:
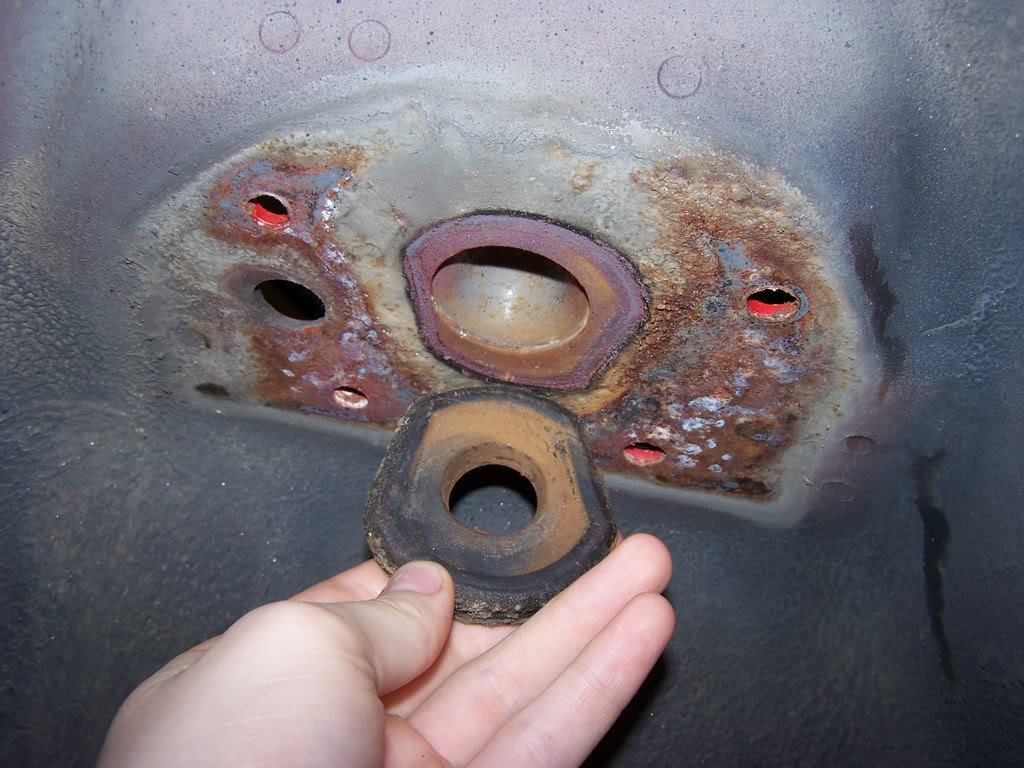
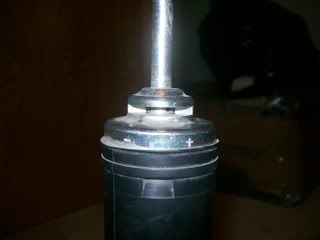
4. This is it assembled:
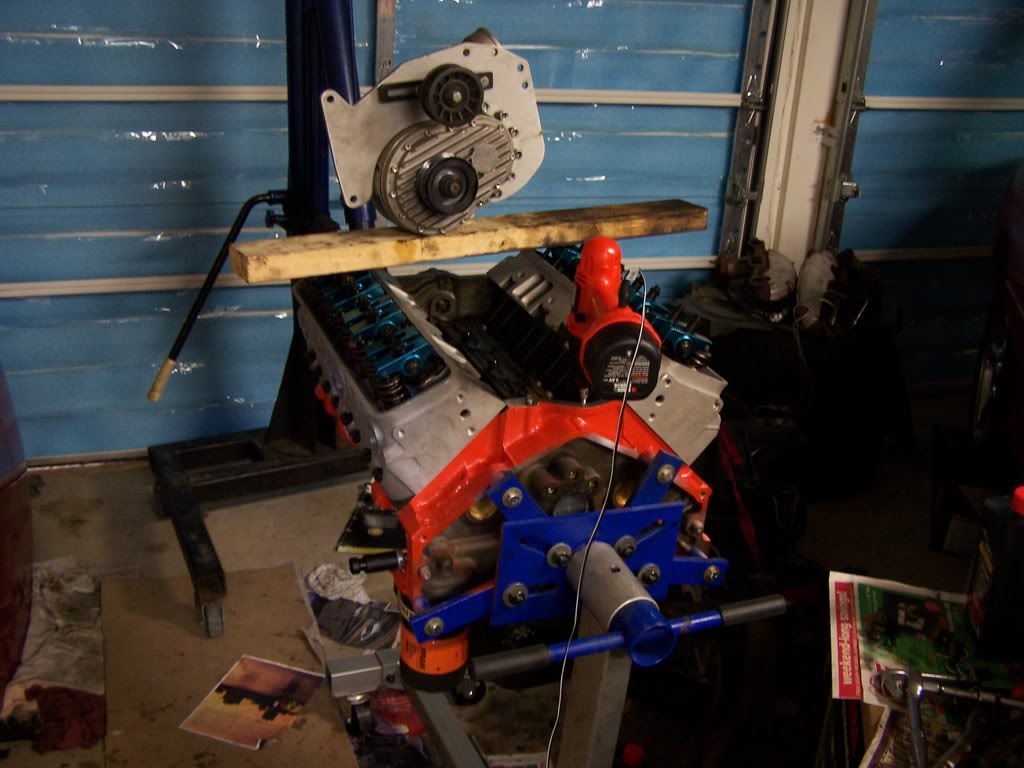
5. And a picture of the forged 355, I'm building. And no, the supercharger is
not going up top, I just wanted it in the picture:
My question is do I have this shock tower assembled right, and where do I get the top piece (rubber piece in picture #1 & 3) above the "dog-bone" piece?
So far these places don't have that rubber piece: Autozone, Advance Auto, and, Summit-Racing.
1. Here is the piece:
2. Here's how I think it goes back together:
3. It looks like it fits right in there:
4. This is it assembled:
5. And a picture of the forged 355, I'm building. And no, the supercharger is
not going up top,
I just wanted it in the picture:My question is do I have this shock tower assembled right, and where do I get the top piece (rubber piece in picture #1 & 3) above the "dog-bone" piece?
So far these places don't have that rubber piece: Autozone, Advance Auto, and, Summit-Racing.